With almost 3 billion active users worldwide, WhatsApp has become an excellent channel for businesses looking to connect with their audience effectively. The WhatsApp Business API takes its functionality to the next level.
The API lets you send messages to thousands of customers automatically. You can send texts, images, videos, and even interactive messages. It's a great way for businesses to send customers information relevant to them, right when they need it. No more generic mass emails or hoping they see your social media posts.
In this guide, we'll walk you through how to use the WhatsApp API to send messages. We'll cover:
- Setting up your WhatsApp Business Platform
- Getting access tokens
- Sending different types of messages
- How to automate the messaging workflow efficiently
Let’s get started then.
Getting Started with the WhatsApp Business Platform
The WhatsApp Business Platform is designed for medium to large businesses to engage with customers on a large scale. It enables enterprises to quickly initiate conversations, send notifications about support or purchases, offer personalized services, and support customers in their preferred communication channels.
Here are the three hosting options available for the WhatsApp Business API:
- Cloud API: Hosted by Meta, this API offers a straightforward, maintenance-friendly way for businesses to connect with customers. It's the preferred choice for most companies due to its simplicity, ease of use, and automatic scaling.
- On-Premises API: Businesses need to host this themselves. This option provides more control over the infrastructure but requires more technical resources and maintenance.
- Business Management API: Essential for managing your WhatsApp Business Account settings, assets, and message templates, this API is necessary regardless of whether you choose the Cloud API or the On-Premises API.
To start using the WhatsApp Business Platform, you must create a Meta Developer Account and a business app in the Meta Developer Dashboard. While not mandatory, you can set up a Meta Business Manager to organize and manage your business assets, including your WhatsApp Business Account.
You'll also need to obtain a dedicated phone number for your business. Then, use that to create a WhatsApp Business Account. Register the number through the WhatsApp Business app or the API.
Then, add the WhatsApp product to your app in the Meta Developer Dashboard. This will automatically create a test WhatsApp Business Account, a test business phone number, and a set of pre-approved message templates for testing and development purposes.
To access certain features, such as higher messaging limits and the ability to send template messages, you must complete the Business Verification process. You must submit your business information for review in the Meta Business Manager.
Essentials of WhatsApp Business Management API
The WhatsApp Business Management API is an essential part of the WhatsApp Business Platform. It works alongside the Cloud API and On-Premises API to help you manage your WhatsApp Business Account settings, assets, and access tokens.
Access Tokens
Access tokens are necessary for authenticating your API requests. They ensure secure communication between your application and the WhatsApp Business Platform.
The Business Management API supports three types of access tokens:
- System User Access Tokens: These tokens represent your business and don't expire. They are essential for Solution Partners who share credit lines with their customers. There are two types of System User tokens:
- Employee System Users: For limited access to specific WhatsApp Business Accounts.
- Admin System Users: For full access to all WhatsApp Business Accounts and assets.
- Business Integration System User Access Tokens: These tokens are specific to individual customer data and are used by Tech Providers and Solution Partners for automated actions without user input.
- User Access Tokens: Generally used for initial app testing. They expire quickly and are less suitable for ongoing development. This token was used in the test message sent above.
Creating System Users and generating Access Tokens
To create a System User and generate an access token:

- Go to the Meta Business Suite and find your business account.
- Click the Settings icon and select "Business settings."
- Go to "Users" > "System users" and click "Add" to create an admin or employee System User.
- Select the System User and click "Generate new token."
- Choose the app and permissions for the token.
- Click "Generate" to create the access token.
Generating these access tokens with the correct permissions is crucial for ensuring your application has the necessary access. Without that, your application may encounter errors or be unable to perform specific actions. It hinders your ability to effectively use the WhatsApp Business Platform.
Rate Limits
These limits determine the number of API calls allowed per hour and help prevent abuse or overload of the platform. The exact limits depend on the type of call and your WhatsApp Business Account status. Knowing these limits and adhering to them helps avoid potential disruptions.
Understanding access tokens, how to create them, and the rate limits will help you authenticate your requests and manage your WhatsApp Business Account effectively.
How to Set Up the WhatsApp Cloud API
Businesses prefer Cloud API over on-premises as it offers a more straightforward setup and maintenance process. Meta hosts the necessary infrastructure, ensuring scalability and reliability. This allows businesses to focus on building their applications and customer experiences rather than managing servers and infrastructure.
The WhatsApp Cloud API is a cloud-hosted version of the WhatsApp Business Platform. It programmatically enables businesses to send and receive messages, media, and interactive message templates.
With the cloud API, you can easily integrate WhatsApp messaging into your business workflows, like customer support, order updates, appointment reminders, and applications like CRM and marketing platforms.
To start using the WhatsApp Cloud API, follow these steps:
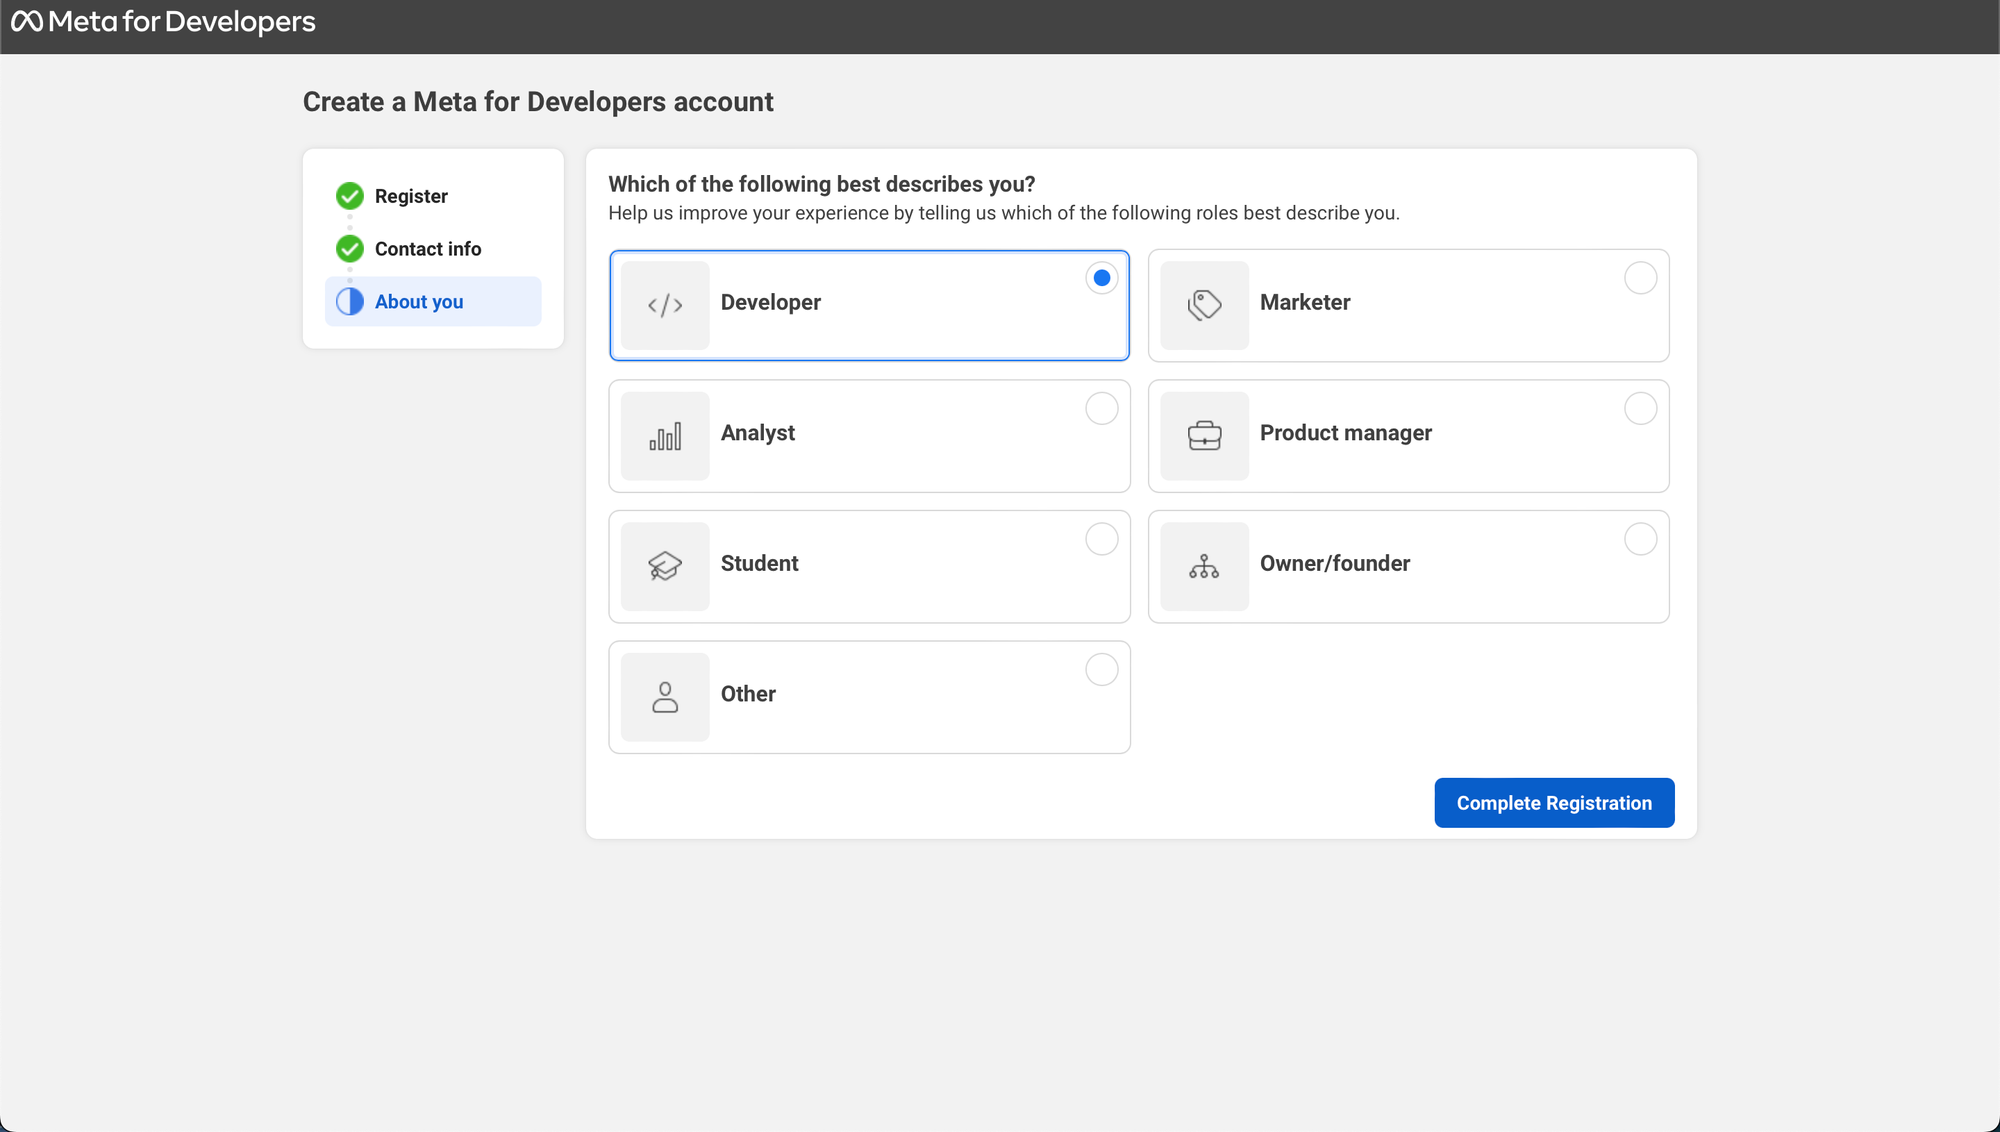
1. Create a Meta Developer Account: If you don't have one already, create a Meta Developer Account at developers.facebook.com.
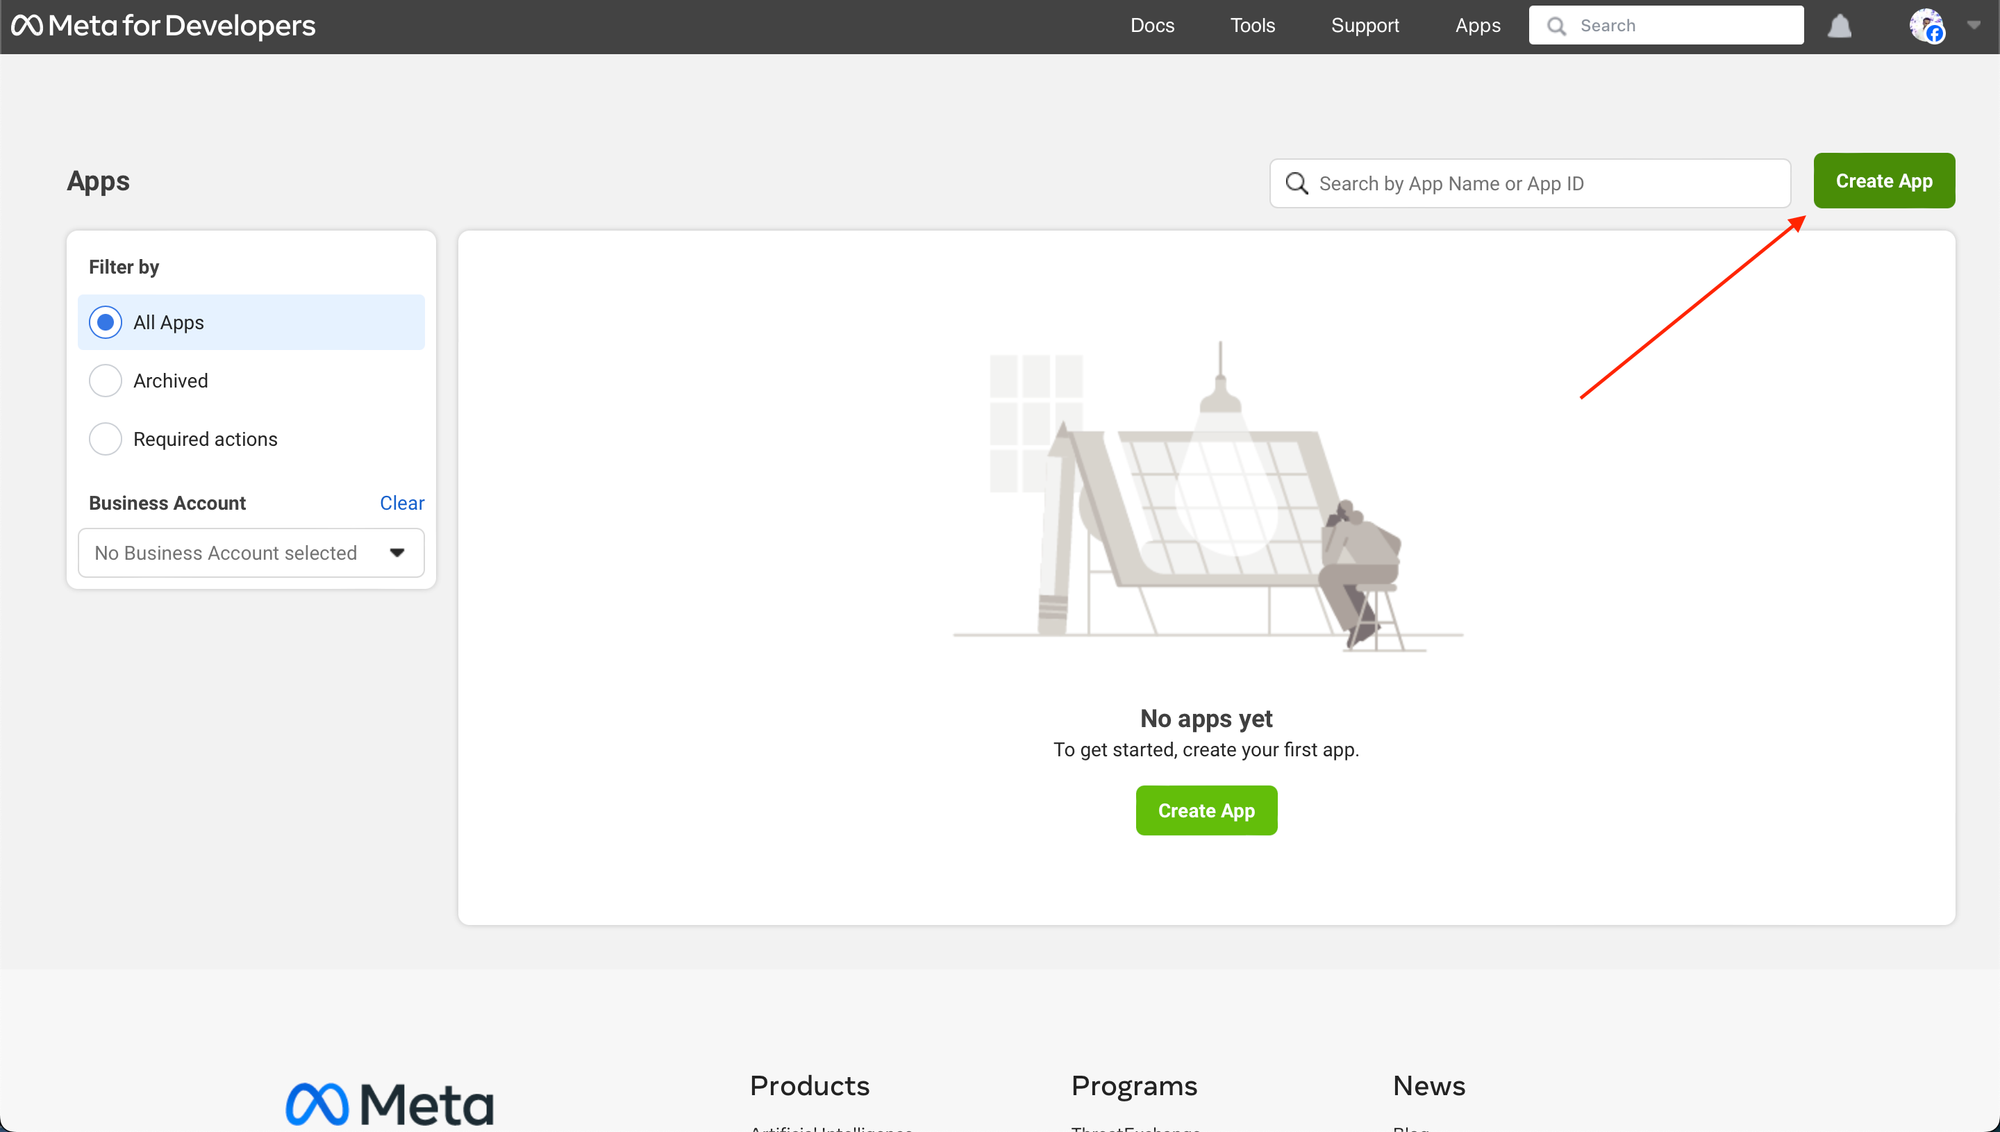
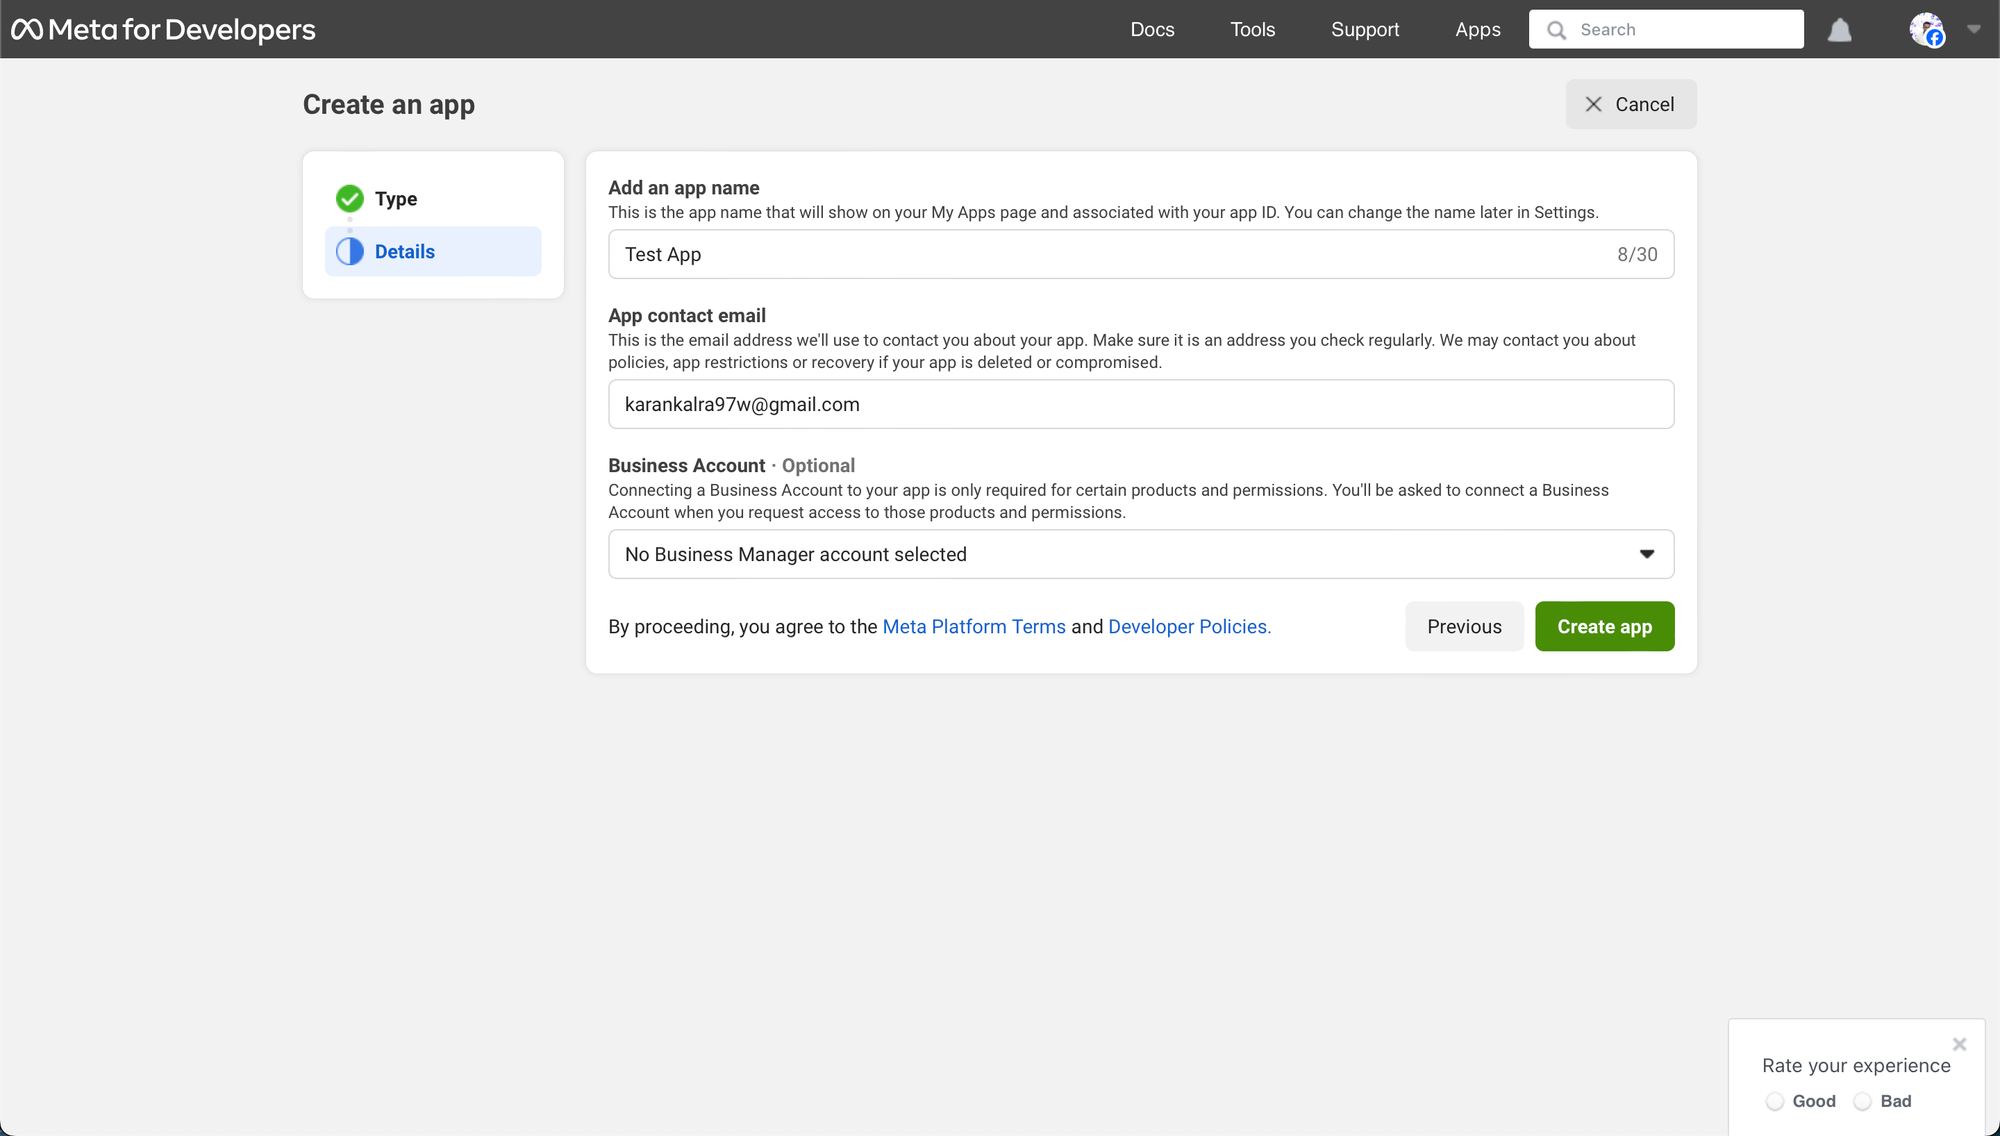
2. Create a new App: In the Meta Developer Dashboard, click on "Create App", choose others, select "Business" as the app type. Fill in the required details and click "Create App".
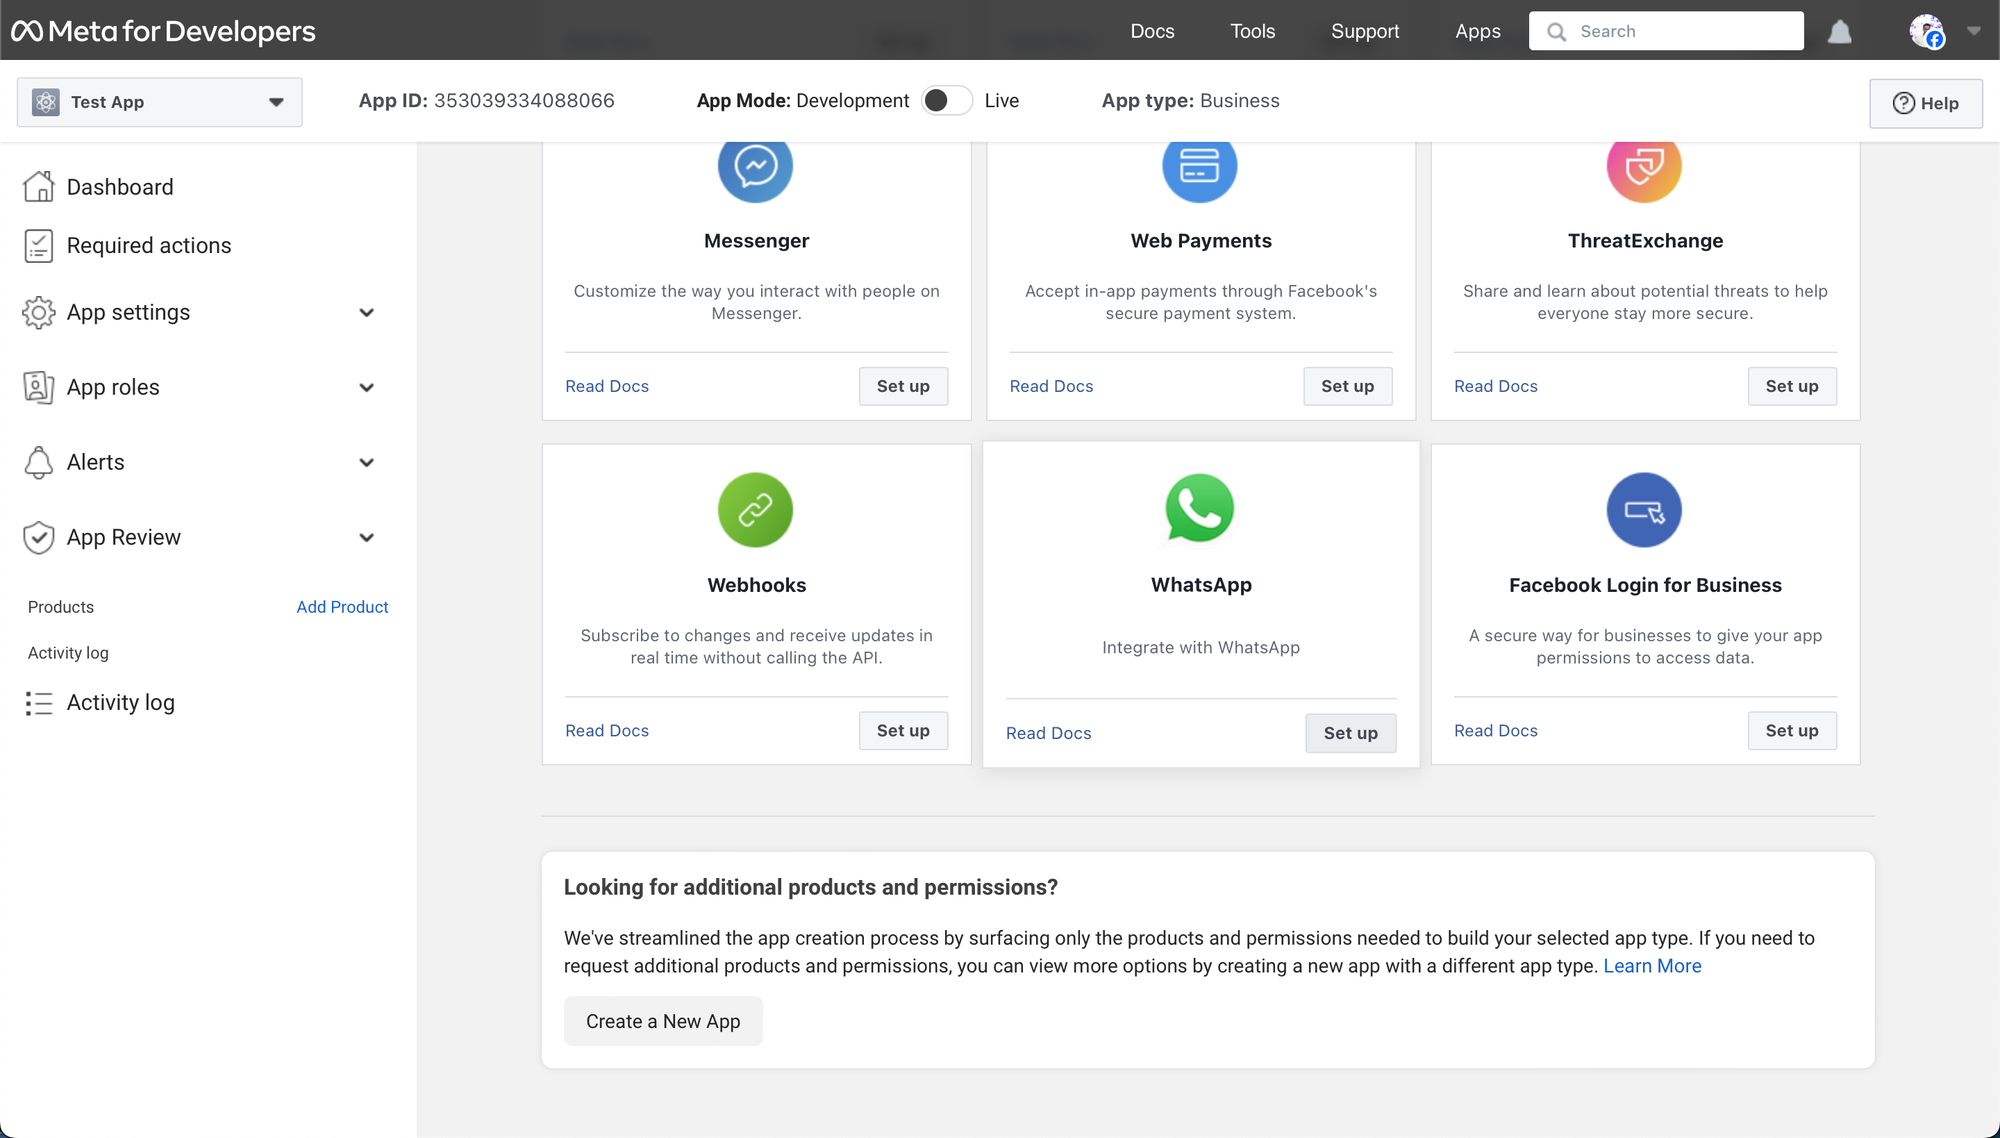
3. Add the WhatsApp product: In your app's dashboard, scroll to the "Add a Product" section and click "Set Up" on the WhatsApp card. If you have a Meta Business Account (MBA), you'll be asked to link it during this process. If not, you'll be guided to create one.
4. Configure your WhatsApp Business Account: Once your MBA is linked, you'll be taken to the WhatsApp Business Account configuration dashboard.
Here, you can:
- Set up a test WhatsApp Business Account (free but with usage limitations)
- Create a test business phone number linked to your WhatsApp Business Account
- Generate pre-approved messaging templates for testing
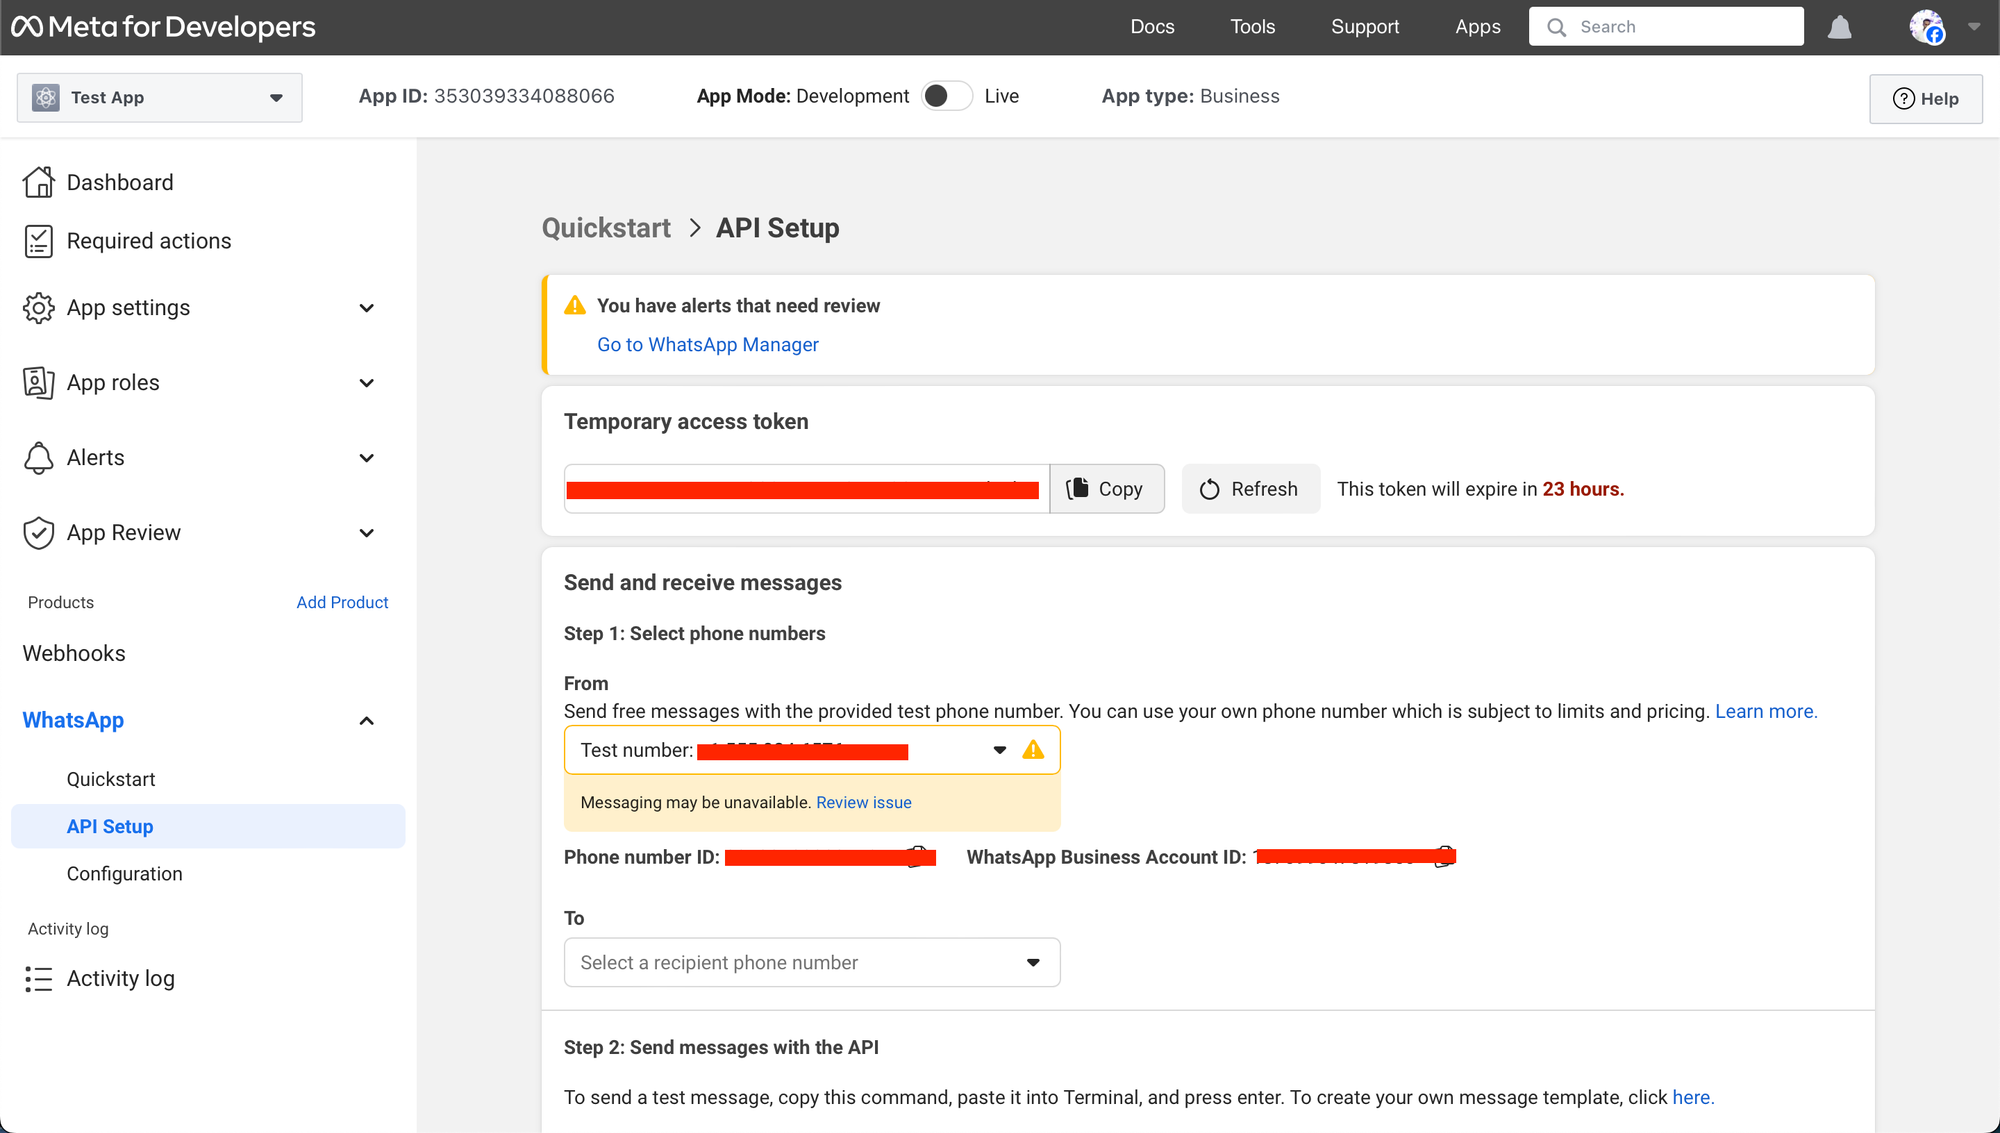
5. Add a recipient number: To send test messages, you must add a valid WhatsApp number. Go to the App Dashboard, navigate to WhatsApp > API Setup, and under the message-sending section, look for the 'To' field to manage your phone number list. Enter a valid WhatsApp number and verify it using the confirmation code sent via WhatsApp.
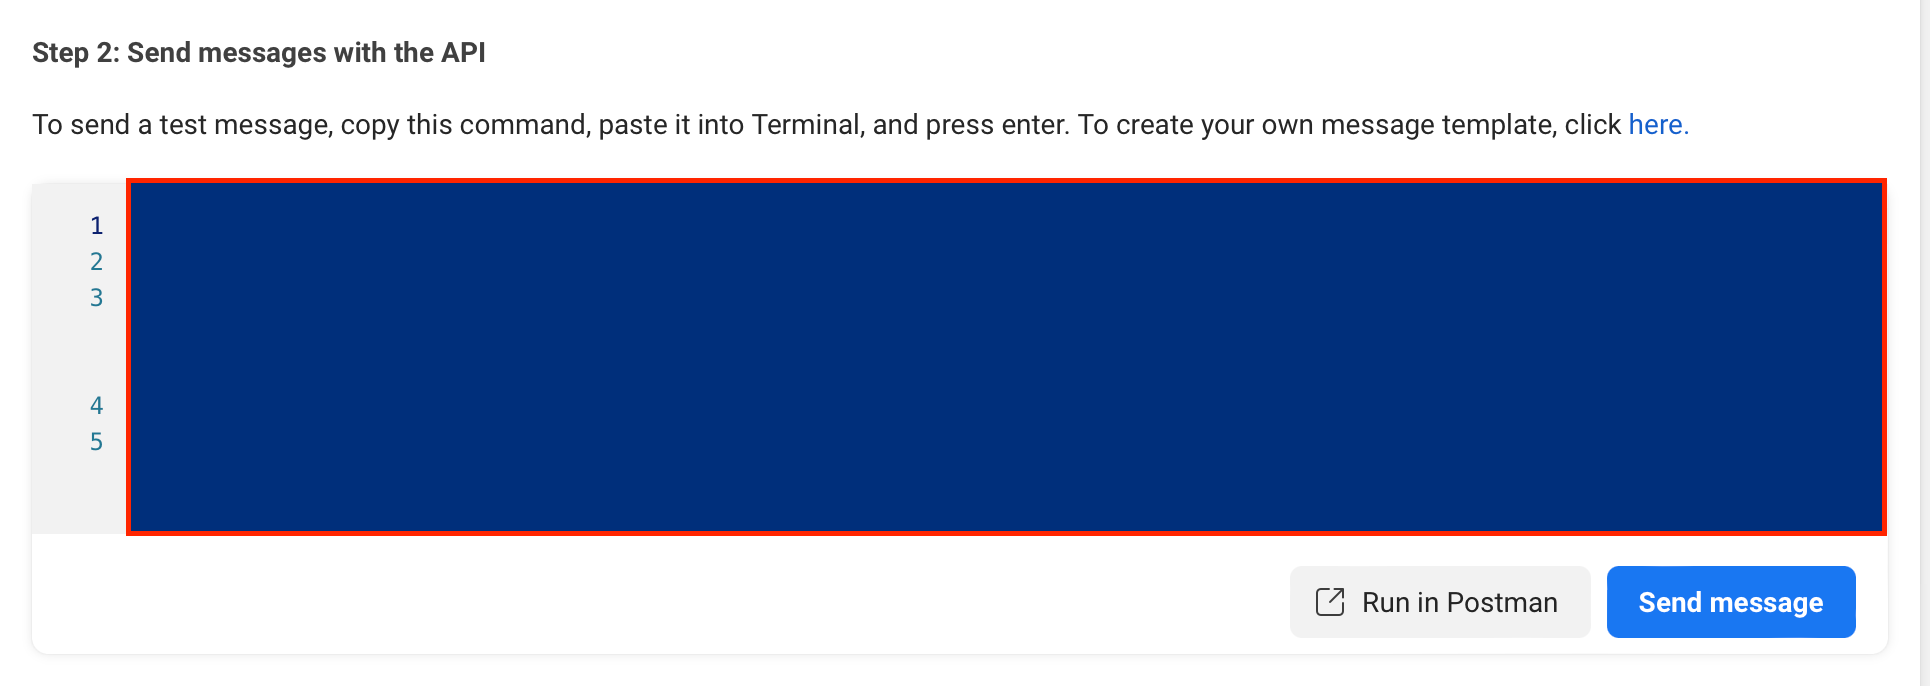
6. Send a test message: Use the pre-approved 'hello_world' template to send a test message to your verified recipient number. You can do this using the API panel in the dashboard or by running the provided Python code.
import requests

url = "https://graph.facebook.com/v17.0/206324309221106/messages"

headers = {
    'Authorization': 'Bearer YOUR_TEMPORARY_ACCESS_TOKEN',
    'Content-Type': 'application/json'
}

data = {
    "messaging_product": "whatsapp",
    "to": "RECEPIENT_PHONE_NUMBER",
    "type": "template",
    "template": {
        "name": "hello_world",
        "language": {
            "code": "en_US"
        }
    }
}

response = requests.post(url, headers=headers, json=data)

print(response.text)
In this example:
- Make sure your test business number is in the 'From' field.
- Ensure the recipient's number is chosen in the 'To' field. You can send messages to multiple numbers if added.
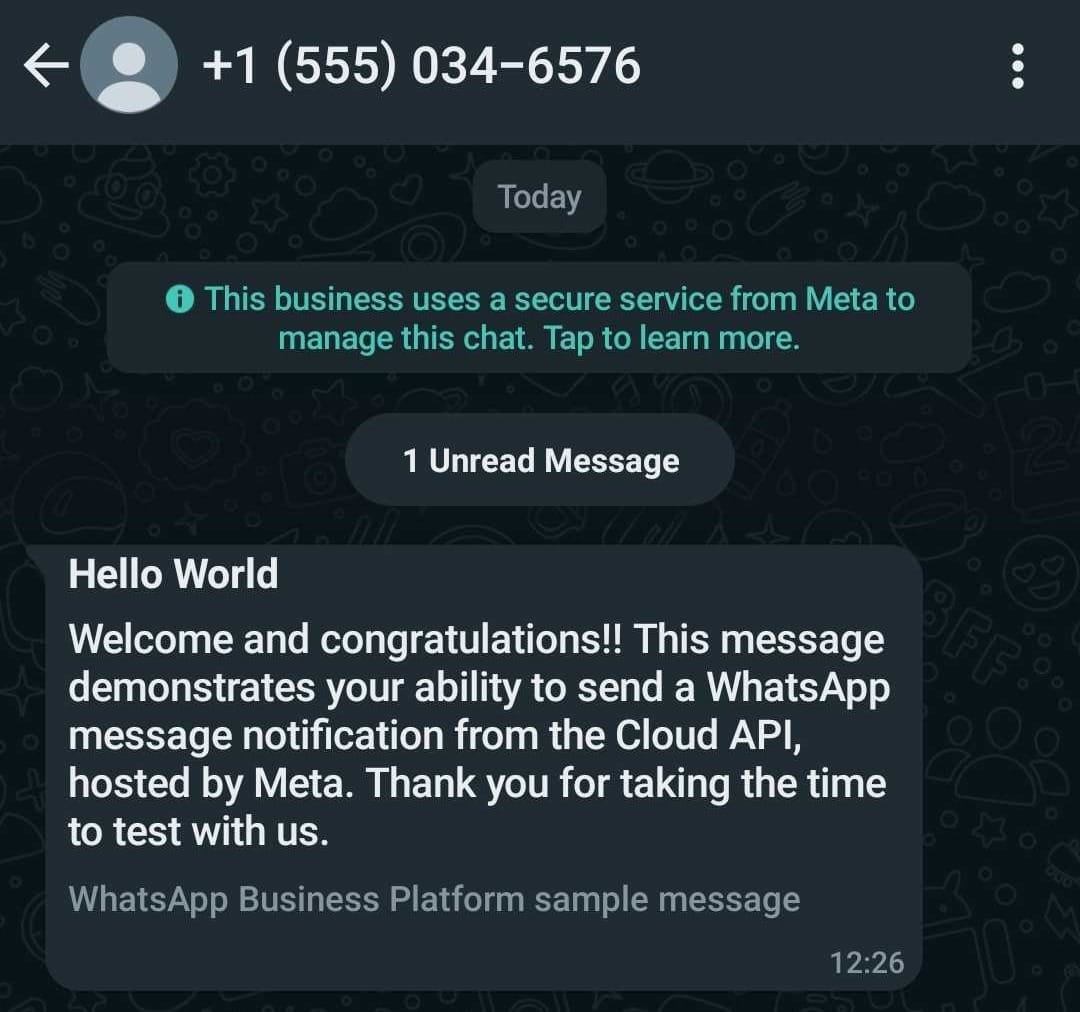
The command you'll use indicates that you're sending a template message, specifying the 'hello_world' template. A message like the one below should appear on the recipient's phone number.
Moving to Production
When you're ready to send messages to your customers, you can add an actual business phone number to the API Setup and create an official WhatsApp Business Account. This will allow you to send messages to your customers without the limitations of the test account.
How to Send Messages Using the WhatsApp Cloud API
The platform also supports two types of messages: free-form and template messages. Free-form messages allow for more flexibility but must be sent within 24 hours of the customer's last message. It can include text, images, videos, documents, and clickable elements.
Template messages are pre-approved, standardized formats that businesses can use to send notifications or customer care messages to opted-in customers. These messages require user consent and approval from the WhatsApp review team. They can include appointment reminders, shipping information, issue resolution, or payment updates.
To send a message using the WhatsApp Cloud API, you need to make an HTTP POST request to the /messages endpoint.
POST /<WHATSAPP_BUSINESS_PHONE_NUMBER>/messages
The request should include your access token in the Authorization header and the message payload in the request body. The message payload has a standard format, with variations depending on the message type:
{
  "messaging_product": "whatsapp",
  "recipient_type": "individual",
  "to": "<TO>",
  "type": "<TYPE>",

  // Specific payload depending on message type
}
<TO>: WhatsApp ID or phone number of the recipient (e.g., +16315551234).<TYPE>: Type of message (e.g., 'text', 'image', etc.).
The response contains a message ID, which is helpful for sending replies or reactions and checking for unsuccessful requests via the status code in the response (typical convention where status code 200 signifies a successful call).
{
  "messaging_product": "whatsapp",
  "contacts": [{
      "input": "<PHONE_NUMBER>",
      "wa_id": "<WHATSAPP_ID>",
    }],
  "messages": [{
      "id": "<wamid.ID>",
    }]
}
Let's explore how to send different types of messages using the WhatsApp Cloud API.
1. Text Messages
Text messages are the most basic type of message you can send using the WhatsApp Cloud API. They contain plain text and can include formatting and preview URLs.
Here's an example of how to send a text message using Python:
import requests

url = "https://graph.facebook.com/v13.0/YOUR_PHONE_NUMBER_ID/messages"
headers = {
    "Authorization": "Bearer YOUR_ACCESS_TOKEN",
    "Content-Type": "application/json"
}
data = {
    "messaging_product": "whatsapp",
    "recipient_type": "individual",
    "to": "RECIPIENT_PHONE_NUMBER",
    "type": "text",
    "text": {
        "preview_url": False,
        "body": "Hello, this is a text message from the WhatsApp Cloud API!"
    }
}

response = requests.post(url, headers=headers, json=data)
print(response.json())
In this example:
YOUR_PHONE_NUMBER_IDis the ID of your WhatsApp Business Account phone number.YOUR_ACCESS_TOKENis the access token you generated for your app.RECIPIENT_PHONE_NUMBERis the WhatsApp number of the message recipient.
The message payload includes the following fields:
messaging_product: Always set to'whatsapp'.recipient_type: Set to'individual'for sending messages to individual users.to: The WhatsApp number of the message recipient.type: The type of message you're sending, in this case,'text'.text: An object containing the text message details, includingpreview_url(set toFalseto turn off link previews) andbody(the actual text content of the message).
2. Reaction Messages
Reaction messages allow you to react to a previous message sent by a user with an emoji. This feature enables you to acknowledge or respond to messages in a quick and expressive way.
Here's an example of how to send a reaction message using Python:
import requests

url = "https://graph.facebook.com/v13.0/YOUR_PHONE_NUMBER_ID/messages"
headers = {
    "Authorization": "Bearer YOUR_ACCESS_TOKEN",
    "Content-Type": "application/json"
}
data = {
    "messaging_product": "whatsapp",
    "recipient_type": "individual",
    "to": "RECIPIENT_PHONE_NUMBER",
    "type": "reaction",
    "reaction": {
        "message_id": "wamid.HBgLM...",
        "emoji": "\U0001F600"
    }
}

response = requests.post(url, headers=headers, json=data)
print(response.json())
In this example:
YOUR_PHONE_NUMBER_ID,YOUR_ACCESS_TOKEN, andRECIPIENT_PHONE_NUMBERhave the same meanings as the previous example.typeis set to'reaction'to indicate that you're sending a reaction message.- The
reactionobject contains themessage_id(ID of the message you're reacting to) and theemojiyou want to use as the reaction – in this case, the emoji python code is 😀.
3. Media Messages
Media messages allow you to send various types of media files, such as images, documents, audio, or video, to recipients using the WhatsApp Cloud API.
Replace TYPE with the appropriate media type (image, document, audio, or video), MEDIA_URL with the media file URL, and CAPTION with an optional caption for the media.
import requests

url = "https://graph.facebook.com/v13.0/YOUR_PHONE_NUMBER_ID/messages"
headers = {
    "Authorization": "Bearer YOUR_ACCESS_TOKEN",
    "Content-Type": "application/json"
}
data = {
    "messaging_product": "whatsapp",
    "recipient_type": "individual",
    "to": "RECIPIENT_PHONE_NUMBER",
    "type": "image",
    "image": {
        "link": "https://example.com/image.jpg",
        "caption": "Check out this image!"
    }
}

response = requests.post(url, headers=headers, json=data)
print(response.json())
In this example:
YOUR_PHONE_NUMBER_ID,YOUR_ACCESS_TOKEN, andRECIPIENT_PHONE_NUMBERhave the same meanings as the previous examples.typeis set to"image"to indicate that you're sending an image message.- The
imageobject contains thelink(URL of the image file) and an optionalcaptionfor the image. - If the
imageobject contains an object, use theIDproperty to indicate its ID (which you must generate) or location on your public server.
4. Location Messages
Location messages allow you to send a location's coordinates to a WhatsApp user.
To send location messages, make a POST call to /YOUR_PHONE_NUMBER_ID/messages and attach a message object with type=location. Then, add a location object.
Here's an example of how to send a location message using Python:
import requests

url = "https://graph.facebook.com/v13.0/YOUR_PHONE_NUMBER_ID/messages"
headers = {
    "Authorization": "Bearer YOUR_ACCESS_TOKEN",
    "Content-Type": "application/json"
}
data = {
    "messaging_product": "whatsapp",
    "recipient_type": "individual",
    "to": "RECIPIENT_PHONE_NUMBER",
    "type": "location",
    "location": {
        "latitude": LATITUDE,
        "longitude": LONGITUDE,
        "name": "LOCATION_NAME",
        "address": "LOCATION_ADDRESS"
    }
}

response = requests.post(url, headers=headers, json=data)
print(response.json())
In this example:
YOUR_PHONE_NUMBER_ID,YOUR_ACCESS_TOKEN, andRECIPIENT_PHONE_NUMBERhave the same meanings as the previous examples.LATITUDEandLONGITUDEare the coordinates of the location you want to send.LOCATION_NAMEis the name of the location.LOCATION_ADDRESSis the address of the location.- Set
typeto"location"to indicate that you're sending a location message. It should includelatitude,longitude,name, andaddress.
5. Contact Messages
Contact messages allow you to send a contact's information, such as their name, phone number, and address, to a WhatsApp user.
Here's an example of how to send a contact message using Python:
import requests
import json

url = "https://graph.facebook.com/v13.0/YOUR_PHONE_NUMBER_ID/messages"
headers = {
    "Authorization": "Bearer YOUR_ACCESS_TOKEN",
    "Content-Type": "application/json"
}
data = {
    "messaging_product": "whatsapp",
    "recipient_type": "individual",
    "to": "RECIPIENT_PHONE_NUMBER",
    "type": "contacts",
    "contacts": [
        {
            "addresses": [
                {
                    "street": "123 Main St",
                    "city": "Anytown",
                    "state": "CA",
                    "zip": "12345",
                    "country": "United States",
                    "country_code": "US",
                    "type": "HOME"
                }
            ],
            "birthday": "1990-01-01",
            "emails": [
                {
                    "email": "john.doe@example.com",
                    "type": "WORK"
                }
            ],
            "name": {
                "formatted_name": "John Doe",
                "first_name": "John",
                "last_name": "Doe"
            },
            "org": {
                "company": "Example Inc.",
                "department": "Sales",
                "title": "Sales Manager"
            },
            "phones": [
                {
                    "phone": "+1 (555) 123-4567",
                    "type": "CELL",
                    "wa_id": "15551234567"
                }
            ],
            "urls": [
                {
                    "url": "https://www.example.com",
                    "type": "WORK"
                }
            ]
        }
    ]
}

response = requests.post(url, headers=headers, json=data)
print(response.json())
In this example:
YOUR_PHONE_NUMBER_ID,YOUR_ACCESS_TOKEN, andRECIPIENT_PHONE_NUMBERhave the same meanings as the previous examples.- Set
typeto"contacts"to indicate that you're sending a contact message. contacts: An array of contact objects containing contact information, such asaddresses,birthdays,emails,names,org names,phone numbers, andurls.
6. Interactive Messages
Interactive messages allow you to create more engaging and interactive experiences for users. The main types of interactive messages are:
a. List Messages
b. Reply Buttons
c. Messages with CTA (Call-to-Action) URL Buttons
d. Flow messages
To send interactive messages, make a POST call to /YOUR_PHONE_NUMBER_ID/messages and attach a message object with type=interactive. Then, add an interactive object.
a. List Messages: List messages present a list of options for users to choose from.
Here's an example of how to send a list message using Python:
import requests
import json

url = "https://graph.facebook.com/v13.0/YOUR_PHONE_NUMBER_ID/messages"
headers = {
    "Authorization": "Bearer YOUR_ACCESS_TOKEN",
    "Content-Type": "application/json"
}
data = {
    "messaging_product": "whatsapp",
    "recipient_type": "individual",
    "to": "RECIPIENT_PHONE_NUMBER",
    "type": "interactive",
    "interactive": {
        "type": "list",
        "header": {
            "type": "text",
            "text": "Choose an option:"
        },
        "body": {
            "text": "Please select one of the following options:"
        },
        "footer": {
            "text": "Thank you for your selection!"
        },
        "action": {
            "button": "Select",
            "sections": [
                {
                    "title": "Section 1",
                    "rows": [
                        {
                            "id": "option1",
                            "title": "Option 1",
                            "description": "This is the first option"
                        },
                        {
                            "id": "option2",
                            "title": "Option 2",
                            "description": "This is the second option"
                        }
                    ]
                }
            ]
        }
    }
}

response = requests.post(url, headers=headers, json=data)
print(response.json())
In this example:
YOUR_PHONE_NUMBER_ID,YOUR_ACCESS_TOKEN, andRECIPIENT_PHONE_NUMBERhave the same meanings as the previous examples.- Set
typeto"interactive"to indicate that you're sending an interactive message. - Set
interactive.typeto"list"to specify that you're sending a list message. - The
interactiveobject contains the details of the list message, including theheader,body,footer, andaction(which defines the list sections and their corresponding rows).
b. Reply buttons: Reply buttons display up to three buttons with predefined reply options.
Here's an example of how to send reply buttons using Python:
import requests
import json

url = "https://graph.facebook.com/v13.0/YOUR_PHONE_NUMBER_ID/messages"
headers = {
    "Authorization": "Bearer YOUR_ACCESS_TOKEN",
    "Content-Type": "application/json"
}
data = {
    "messaging_product": "whatsapp",
    "recipient_type": "individual",
    "to": "RECIPIENT_PHONE_NUMBER",
    "type": "interactive",
    "interactive": {
        "type": "button",
        "body": {
            "text": "Select an option:"
        },
        "action": {
            "buttons": [
                {
                    "type": "reply",
                    "reply": {
                        "id": "option1",
                        "title": "Option 1"
                    }
                },
                {
                    "type": "reply",
                    "reply": {
                        "id": "option2",
                        "title": "Option 2"
                    }
                }
            ]
        }
    }
}

response = requests.post(url, headers=headers, json=data)
print(response.json())
In this example:
YOUR_PHONE_NUMBER_ID,YOUR_ACCESS_TOKEN, andRECIPIENT_PHONE_NUMBERhave the same meanings as the previous examples.- Set
typeto"interactive"to indicate that you're sending an interactive message. - Set
interactive.typeto"button"to specify that you're sending reply buttons. - The
interactiveobject contains the details of the reply buttons, including thebody(button text) andaction(which defines the reply buttons and their corresponding IDs and titles).
c. Messages with CTA URL Buttons: They allow you to include clickable buttons that redirect users to a specific URL.
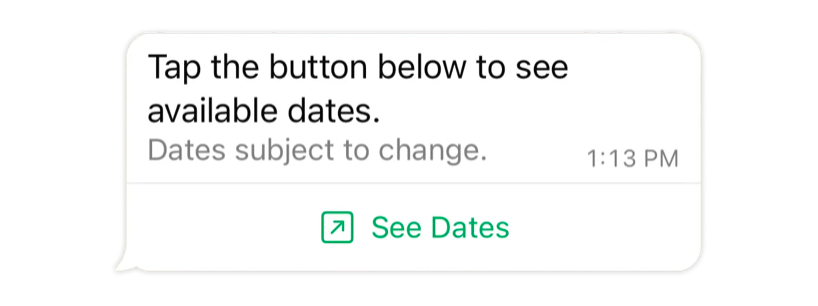
Here's an example of how to send a message with CTA URL buttons using Python:
import requests
import json

url = "https://graph.facebook.com/v13.0/YOUR_PHONE_NUMBER_ID/messages"
headers = {
    "Authorization": "Bearer YOUR_ACCESS_TOKEN",
    "Content-Type": "application/json"
}
data = {
    "messaging_product": "whatsapp",
    "recipient_type": "individual",
    "to": "RECIPIENT_PHONE_NUMBER",
    "type": "interactive",
    "interactive": {
        "type": "button",
        "body": {
            "text": "Click the button below:"
        },
        "action": {
            "buttons": [
                {
                    "type": "url",
                    "url": "https://example.com",
                    "title": "Visit Website"
                }
            ]
        }
    }
}

response = requests.post(url, headers=headers, json=data)
print(response.json())
In this example:
YOUR_PHONE_NUMBER_ID,YOUR_ACCESS_TOKEN, andRECIPIENT_PHONE_NUMBERhave the same meanings as the previous examples.- Set
typeto"interactive"to indicate that you're sending an interactive message. - Set
interactive.typeto"button"to specify that you're sending CTA URL buttons. - The
interactiveobject contains the details of the CTA URL buttons, including thebody(button text) andaction(which defines the URL buttons and their corresponding URLs and titles).
d. Flow Messages: These messages are designed to guide users through a series of predefined steps or screens. These messages provide a more engaging and structured way to interact with your customers.
Here's an example of how to send a Flow Message using the WhatsApp Business API:
import requests

url = "https://graph.facebook.com/v13.0/YOUR_PHONE_NUMBER_ID/messages"
headers = {
    "Authorization": "Bearer YOUR_ACCESS_TOKEN",
    "Content-Type": "application/json"
}
data = {
    "messaging_product": "whatsapp",
    "recipient_type": "individual",
    "to": "RECIPIENT_PHONE_NUMBER",
    "type": "interactive",
    "interactive": {
        "type": "flow",
        "header": {
            "type": "text",
            "text": "Welcome to our Flow!"
        },
        "body": {
            "text": "Please follow the steps to complete the process."
        },
        "footer": {
            "text": "Thank you for using our service."
        },
        "action": {
            "name": "flow",
            "parameters": {
                "flow_message_version": "3",
                "flow_token": "YOUR_FLOW_TOKEN",
                "flow_id": "YOUR_FLOW_ID",
                "flow_cta": "Start",
                "flow_action": "navigate",
                "flow_action_payload": {
                    "screen": "SCREEN_ID",
                    "data": {
                        "key1": "value1",
                        "key2": "value2"
                    }
                }
            }
        }
    }
}

response = requests.post(url, headers=headers, json=data)
print(response.json())
In this example:
interactive.type and interactive.action.namemust be set to"flow"to indicate that you're sending a Flow Message.interactive.action.parameters.flow_token: This property is a unique token generated by the business to serve as an identifier for the Flow.interactive.action.parameters.flow_id: This property is a unique ID provided by WhatsApp for the specific Flow.interactive.action.parameters.flow_cta: This property represents the text displayed on the call-to-action (CTA) button, such as "Signup". The character limit for this property is 20 characters, and emojis are not allowed.interactive.action.parameters.flow_action: This property can be set to either"navigate"or"data_exchange". The default value is"navigate".
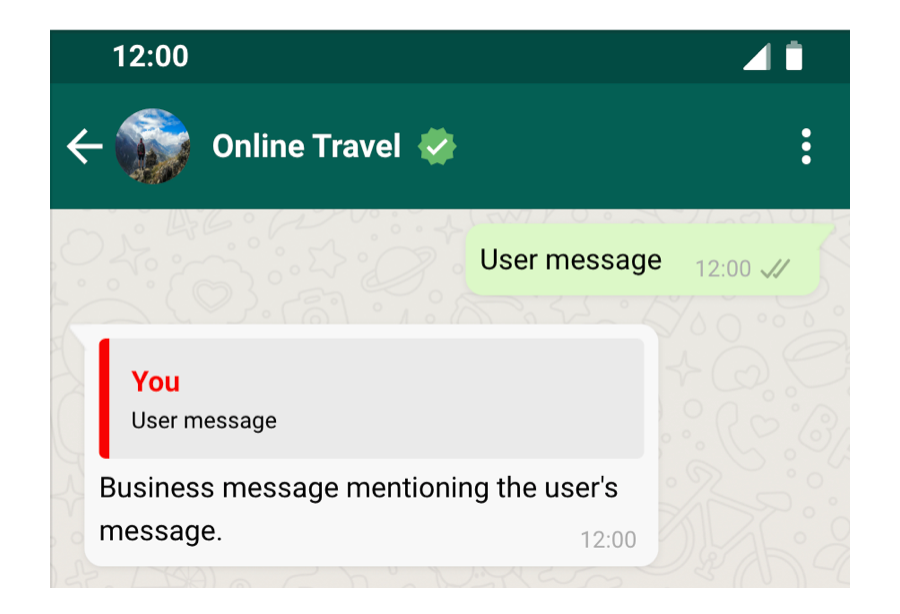
7. Sending Quoted Replies
You can send a message as a reply to a previous message in a conversation by including the ID of the previous message in the context object of your request payload. This way, the recipient will receive the new message with a contextual bubble showing the content of the message you're replying to.
Here's an example of how to send a reply using Python:
import requests

url = "https://graph.facebook.com/v13.0/YOUR_PHONE_NUMBER_ID/messages"
headers = {
    "Authorization": "Bearer YOUR_ACCESS_TOKEN",
    "Content-Type": "application/json"
}
data = {
    "messaging_product": "whatsapp",
    "recipient_type": "individual",
    "to": "RECIPIENT_PHONE_NUMBER",
    "context": {
        "message_id": "wamid.HBgLM..."
    },
    "type": "text",
    "text": {
        "preview_url": False,
        "body": "This is a reply to a previous message."
    }
}

response = requests.post(url, headers=headers, json=data)
print(response.json())
In this example:
YOUR_PHONE_NUMBER_ID,YOUR_ACCESS_TOKEN, andRECIPIENT_PHONE_NUMBERhave the same meanings as the previous examples.MESSAGE_ID_TO_REPLY_TOis the ID of the message you want to reply to.contextobject should include themessage_idof the message you want to reply to.- Set the
typeof message you're sending (in this case,"text"). textobject contains the text message details, includingpreview_url(set tofalseto turn off link previews) andbody(the actual text content of your reply).
YOUR_PHONE_NUMBER_ID, YOUR_ACCESS_TOKEN, RECIPIENT_PHONE_NUMBER, MESSAGE_ID_TO_REPLY_TO) with the appropriate values for your use case.8. Video Messages
You can now send video messages to your customers on WhatsApp. The message will display a thumbnail preview of the video along with an optional caption. When the recipient taps on the preview, the video is loaded and played within WhatsApp.
Here's an example of how to send a video message using Python:
import requests

url = "https://graph.facebook.com/v13.0/YOUR_PHONE_NUMBER_ID/messages"
headers = {
    "Authorization": "Bearer YOUR_ACCESS_TOKEN",
    "Content-Type": "application/json"
}
data = {
    "messaging_product": "whatsapp",
    "recipient_type": "individual",
    "to": "RECIPIENT_PHONE_NUMBER",
    "type": "video",
    "video": {
        "link": "https://example.com/video.mp4",
        "caption": "Check out this amazing video!"
    }
}

response = requests.post(url, headers=headers, json=data)
print(response.json())
In this example:
YOUR_PHONE_NUMBER_ID,YOUR_ACCESS_TOKEN, andRECIPIENT_PHONE_NUMBERhave the same meanings as the previous examples.- The
videoobject contains thelinkproperty, enter the URL of the video file hosted on your server here. Alternatively, you can use theidproperty if you have previously uploaded the video to WhatsApp's servers using the Media API. - The
captionproperty is optional and allows you to add a caption to the video message. The maximum length of the caption is 1024 characters. - The API supports formats like 3GPP and MP4, with a maximum size of 16 MB and a video/3gp MIME type.
- Only the H.264 video codec and AAC audio codec are supported. The video should either have a single audio stream or no audio stream at all.
9. Address Messages
Address messages allow you to easily request a delivery address from WhatsApp users. This feature is currently available only for businesses based in Singapore and their Singapore customers, and businesses based in India and their India customers.
Here's an example of how to send an address message using Python:
import requests

url = "https://graph.facebook.com/v13.0/YOUR_PHONE_NUMBER_ID/messages"
headers = {
    "Authorization": "Bearer YOUR_ACCESS_TOKEN",
    "Content-Type": "application/json"
}
data = {
    "messaging_product": "whatsapp",
    "recipient_type": "individual",
    "to": "RECIPIENT_PHONE_NUMBER",
    "type": "interactive",
    "interactive": {
        "type": "address_message",
        "body": {
            "text": "Please provide your delivery address."
        },
        "action": {
            "name": "address_message",
            "parameters": {
                "country": "IN",
                "values": {
                    "name": "John Doe",
                    "phone_number": "+91XXXXXXXXXX"
                }
            }
        }
    }
}

response = requests.post(url, headers=headers, json=data)
print(response.json())
In this example:
- Optionally, prefill address fields using the
valuesparameter. - Set
interactive.typeto"address_message"to indicate that you're sending an address message. - Provide the message text in the
body.textfield. - Set the
action.nameto"address_message". - Specify the
countryparameter with the ISO code of the country (e.g., "IN" for India, "SG" for Singapore).
When a user submits an address, you will receive a webhook notification containing the details of the submitted address in the response_json field.
While free-form messages offer flexibility, WhatsApp also provides a way to send pre-approved message templates for common use cases, which we'll explore below.
Template Messages
WhatsApp message templates are pre-approved message formats that businesses can use to send notifications or customer care messages to users who have opted in. These messages can include appointment reminders, shipping information, issue resolution, payment updates, and more.
Before sending a template message, you need to create a template in the WhatsApp Manager:
Step 1: Go to Business Manager and select your business.
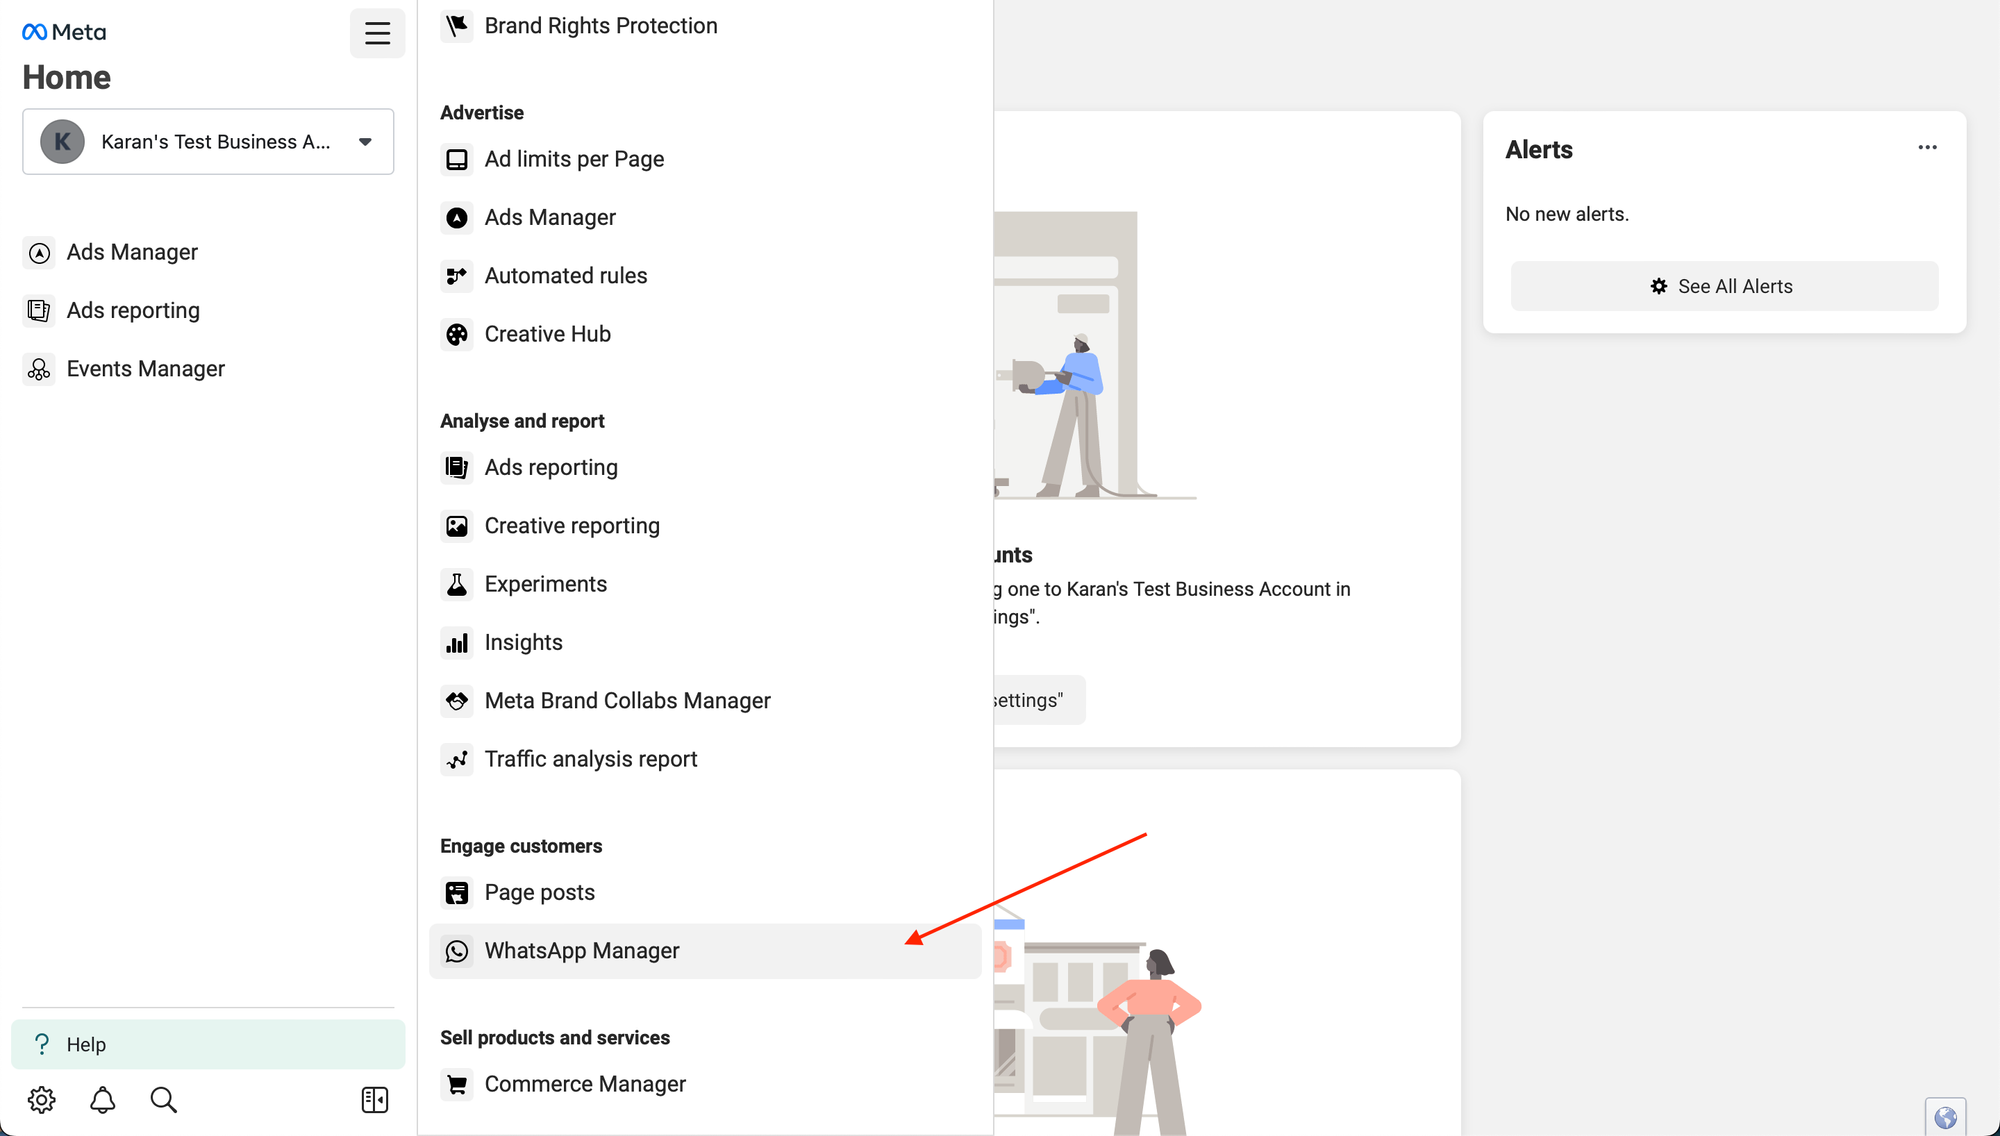
Step 2: Open the Menu and click on "WhatsApp Manager".
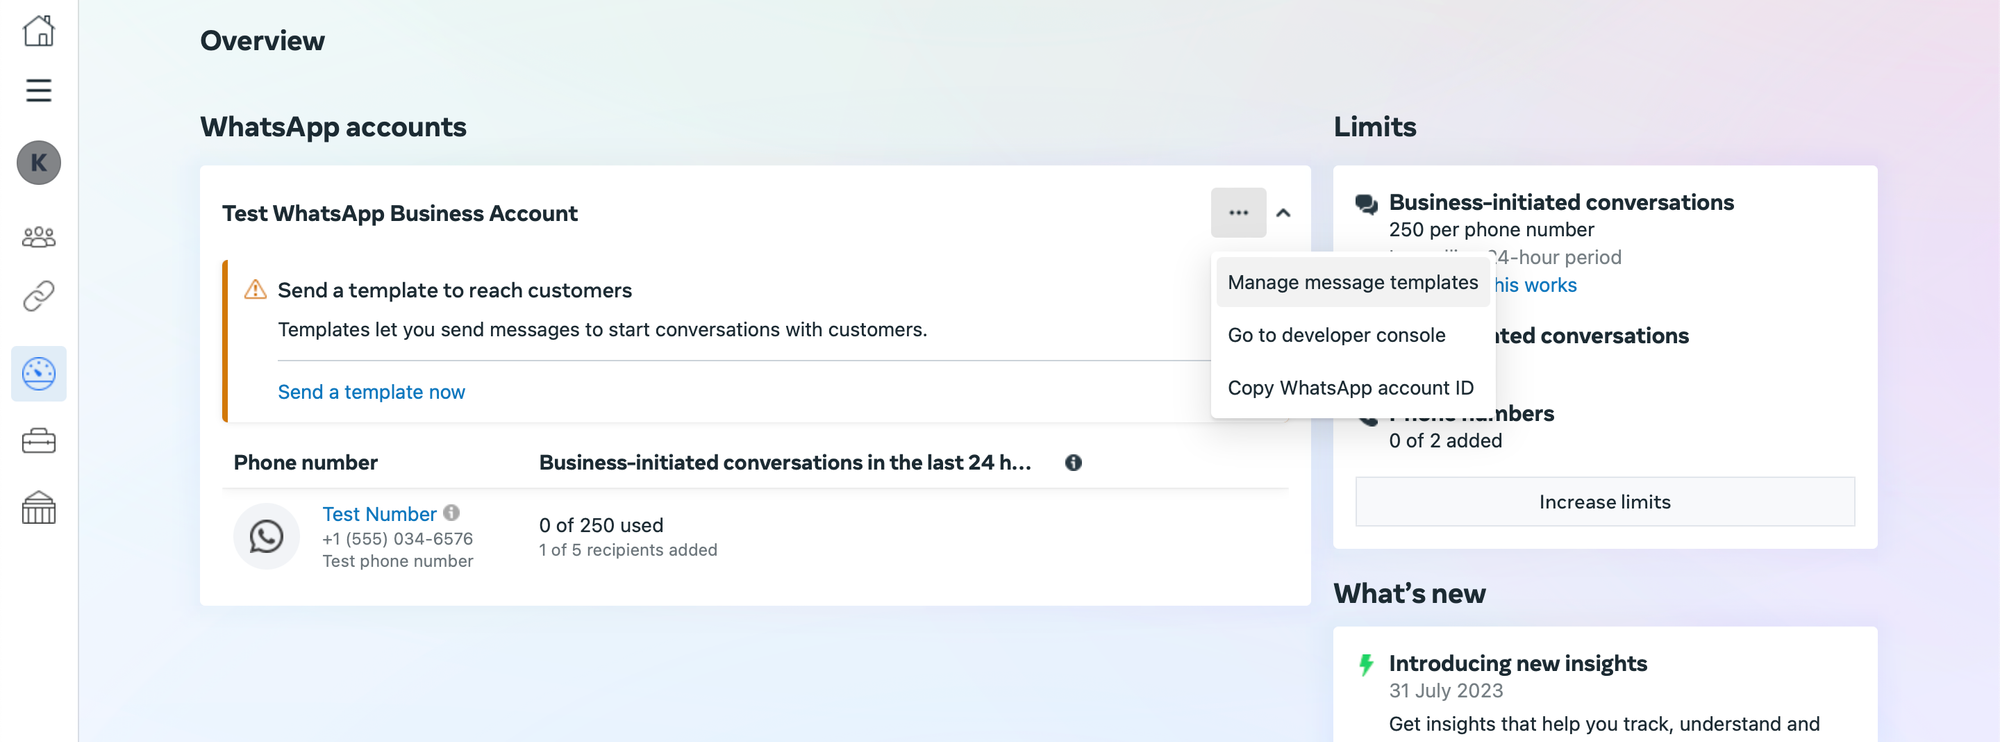
Step 3: Click on "Manage Message Templates".
You can create message templates in two ways:
- Use one of the pre-approved templates provided by WhatsApp. You can find a list of pre-approved templates here. These templates are ready to use and do not need approval.
- Create your own template with the required framework and submit it for approval by Meta. Once approved, you can start using your custom template.
Let's explore a few examples of sending different types of message templates.
1. Catalog Template Messages
Catalog template messages allow you to showcase products from your inventory in a WhatsApp message. To send catalog template messages, you need to have:
- An inventory uploaded to Meta. You can create it using this guide.
- An e-commerce catalog connected to your WhatsApp Business Account.
Setup: You'll first need to create a catalog template. Follow this guide to create a catalog template in minutes.
Request Syntax: To send a catalog template message, use the WhatsApp Business Phone Number > Messages endpoint.
Let's say we create a template called summer_sale_catalog.
import requests

url = "https://graph.facebook.com/v13.0/YOUR_PHONE_NUMBER_ID/messages"
headers = {
    "Authorization": "Bearer YOUR_ACCESS_TOKEN",
    "Content-Type": "application/json"
}
data = {
    "messaging_product": "whatsapp",
    "recipient_type": "individual",
    "to": "1605551234",
    "type": "template",
    "template": {
        "name": "fashionista_summer_dresses",
        "language": {
            "code": "en_US"
        },
        "components": [
            {
                "type": "body",
                "parameters": [
                    {
                        "type": "text",
                        "text": "Floral Maxi Dress - $79.99"
                    },
                    {
                        "type": "text",
                        "text": "Bohemian Sundress - $59.99"
                    },
                    {
                        "type": "text",
                        "text": "Lace Midi Dress - $89.99"
                    }
                ]
            },
            {
                "type": "button",
                "sub_type": "CATALOG",
                "index": 0,
                "parameters": [
                    {
                        "type": "action",
                        "action": {
                            "thumbnail_product_retailer_id": "SDRSS2023"
                        }
                    }
                ]
            }
        ]
    }
}

response = requests.post(url, headers=headers, json=data)
print(response.json())
In this example:
- The
templateobject specifies the name of the catalog template (fashionista_summer_dresses) and the language code (en_USfor English). - The
componentsarray contains threeparameters, each representing a different summer dress and its price:- The first parameter represents the "Floral Maxi Dress" priced at $79.99.
- The second parameter represents the "Bohemian Sundress" priced at $59.99.
- The third parameter represents the "Lace Midi Dress" priced at $89.99.
buttonshowcases a specific summer dress from the catalog using thethumbnail_product_retailer_idset to"SDRSS2023".
2. Carousel Template Messages
Carousel templates allow you to send interactive messages with multiple scrollable cards, each containing an image, text, and buttons.
Request Syntax: Similar to catalog templates, use the WhatsApp Business Phone Number > Messages endpoint.
Below is a sample request for dispatching a carousel template, incorporating a message bubble that needs input for two distinct variables. It includes two carousel cards, each featuring an image header, and necessitates input for text in the body and variables associated with buttons.
Setup: You'll need to make sure you create a carousel template first. Follow this guide to create a carousel template within seconds.
Example Request:
import requests
import json

url = "https://graph.facebook.com/v13.0/YOUR_PHONE_NUMBER_ID/messages"
headers = {
    "Authorization": "Bearer YOUR_ACCESS_TOKEN",
    "Content-Type": "application/json"
}
}
data = {
    "messaging_product": "whatsapp",
    "recipient_type": "individual",
    "to": "1605551234",
    "type": "template",
    "template": {
        "name": "fashionista_summer_carousel",
        "language": {
            "code": "en_US"
        },
        "components": [
            {
                "type": "header",
                "parameters": [
                    {
                        "type": "text",
                        "text": "Fashionista Summer Collection"
                    }
                ]
            },
            {
                "type": "body",
                "parameters": [
                    {
                        "type": "text",
                        "text": "Check out our stunning summer dresses:"
                    }
                ]
            },
            {
                "type": "CAROUSEL",
                "cards": [
                    {
                        "card_index": 0,
                        "components": [
                            {
                                "type": "HEADER",
                                "parameters": [
                                    {
                                        "type": "IMAGE",
                                        "image": {
                                            "id": "1234567890"
                                        }
                                    }
                                ]
                            },
                            {
                                "type": "BODY",
                                "parameters": [
                                    {
                                        "type": "TEXT",
                                        "text": "Floral Maxi Dress"
                                    },
                                    {
                                        "type": "TEXT",
                                        "text": "$79.99"
                                    }
                                ]
                            },
                            {
                                "type": "BUTTON",
                                "sub_type": "URL",
                                "index": 0,
                                "parameters": [
                                    {
                                        "type": "TEXT",
                                        "text": "floral-maxi-dress"
                                    }
                                ]
                            }
                        ]
                    },
                    {
                        "card_index": 1,
                        "components": [
                            {
                                "type": "HEADER",
                                "parameters": [
                                    {
                                        "type": "IMAGE",
                                        "image": {
                                            "id": "0987654321"
                                        }
                                    }
                                ]
                            },
                            {
                                "type": "BODY",
                                "parameters": [
                                    {
                                        "type": "TEXT",
                                        "text": "Bohemian Sundress"
                                    },
                                    {
                                        "type": "TEXT",
                                        "text": "$59.99"
                                    }
                                ]
                            },
                            {
                                "type": "BUTTON",
                                "sub_type": "URL",
                                "index": 0,
                                "parameters": [
                                    {
                                        "type": "TEXT",
                                        "text": "bohemian-sundress"
                                    }
                                ]
                            }
                        ]
                    },
                    {
                        "card_index": 2,
                        "components": [
                            {
                                "type": "HEADER",
                                "parameters": [
                                    {
                                        "type": "IMAGE",
                                        "image": {
                                            "id": "1357924680"
                                        }
                                    }
                                ]
                            },
                            {
                                "type": "BODY",
                                "parameters": [
                                    {
                                        "type": "TEXT",
                                        "text": "Lace Midi Dress"
                                    },
                                    {
                                        "type": "TEXT",
                                        "text": "$89.99"
                                    }
                                ]
                            },
                            {
                                "type": "BUTTON",
                                "sub_type": "URL",
                                "index": 0,
                                "parameters": [
                                    {
                                        "type": "TEXT",
                                        "text": "lace-midi-dress"
                                    }
                                ]
                            }
                        ]
                    }
                ]
            }
        ]
    }
}

response = requests.post(url, headers=headers, json=data)
print(response.json())
In this example:
- The
templateobject specifies the name of the carousel template ("fashionista_summer_carousel") and the language code ("en_US"for English). - The
componentsarray contains four objects:headerdisplays the title "Fashionista Summer Collection".bodyprovides an introductory message.CAROUSELincludes an array ofcards, each representing a different summer dress.
- Each card has a
card_indexand its own set ofcomponents:HEADERdisplays an image of the dress using theimageparameter, theBODYcomponent shows the name and price of the dress, and theBUTTONincludes the URL slug for the specific dress.
For more information on message templates and their usage, refer to the WhatsApp Business Platform documentation.
WhatsApp Messaging Workflow
How does it all translate into a complete messaging workflow? That's what we'll discuss in this section. Let's consider a Whatsapp marketing campaign as an example. The idea is to try and automate it using the Whatsapp API in Python.
To begin with, we'll automate the process of extracting daily leads from HubSpot via its API. Automated messages will then be sent to these leads through WhatsApp's API. Sounds interesting, right? Let's break it down step by step.
Please note that we'll be using HubSpot fields to create dynamic messages based on various attributes.
Step 1: Script to Get Daily Leads from HubSpot
Let's write a Python script to fetch daily leads from HubSpot using their API. We'll use a custom field, like Date_Created, to filter the leads created within the last 24 hours.
import requests
from datetime import datetime, timedelta

# HubSpot API details
HUBSPOT_API_KEY = 'your_hubspot_api_key'
HUBSPOT_CONTACTS_URL = 'https://api.hubapi.com/crm/v3/objects/contacts'

# Calculate yesterday's date
yesterday = (datetime.now() - timedelta(days=1)).strftime('%Y-%m-%d')

# Query parameters for the API call
params = {
    'hapikey': HUBSPOT_API_KEY,
    'limit': 100,  # Adjust the limit as needed
    'properties': ['firstname', 'lastname', 'phone', 'email', 'Date_Created'],
    'filters': [{
        'propertyName': 'Date_Created',
        'operator': 'GTE',
        'value': yesterday
    }]
}

# API call to get contacts
response = requests.get(HUBSPOT_CONTACTS_URL, params=params)
leads = response.json()

# Extract relevant information
daily_leads = [{'name': f"{lead['properties']['firstname']} {lead['properties']['lastname']}",
                'phone': lead['properties']['phone'],
                'email': lead['properties']['email']}
               for lead in leads['results']]

# Print the leads
print(daily_leads)
ask
This script does the following:
- We calculate yesterday's date using
datetimeandtimedeltato filter leads created within the last 24 hours. - We extract the relevant information (name, phone, email) from the leads and store them in the
daily_leadslist.
Step 2: Sending Automated Messages via WhatsApp API
Now that we have the list of daily leads, let's send them personalized messages using the WhatsApp API. We'll create dynamic messages based on the lead's information from HubSpot, such as their name, email, or any other relevant data.
import requests
import json

# WhatsApp API details
WHATSAPP_API_URL = 'https://graph.facebook.com/v18.0/YOUR_PHONE_NUMBER_ID/messages'
ACCESS_TOKEN = 'your_whatsapp_access_token'

# Function to send message
def send_whatsapp_message(phone_number, message):
    headers = {
        'Authorization': f'Bearer {ACCESS_TOKEN}',
        'Content-Type': 'application/json'
    }

    payload = {
        'messaging_product': 'whatsapp',
        'recipient_type': 'individual',
        'to': phone_number,
        'type': 'text',
        'text': {'body': message}
    }

    response = requests.post(WHATSAPP_API_URL, headers=headers, json=payload)
    return response.json()

# Loop through the leads and send messages
for lead in daily_leads:
    # Custom message based on HubSpot fields
    message = f"Hello {lead['name']}, we have exciting updates for you! Check your email at {lead['email']} for more details."

    # Send message
    send_response = send_whatsapp_message(lead['phone'], message)
    print(f"Message sent to {lead['name']}: {send_response}")
In this script:
send_whatsapp_messagetakes a phone number and a message as input. This function sends the message to the specified phone number using the WhatsApp API.- We loop through each lead in the
daily_leadslist. - For each lead, we create a personalized message using the lead's information from HubSpot, such as their name and email.
- We call the
send_whatsapp_messagefunction to send the personalized message to the lead's phone number.
By combining these two scripts, you can automate the process of extracting daily leads from HubSpot and sending them personalized messages via WhatsApp. This workflow helps you engage with your leads promptly and efficiently, increasing the chances of conversion and building stronger relationships.
How to automate WhatsApp messaging workflow with Nanonets
With Nanonets, you can automate your entire WhatsApp messaging workflow using natural language prompts. Simply describe your workflow requirements in plain English, and Nanonets' intelligent workflow builder will create the workflow within seconds.
To get started, you need to authenticate your HubSpot and WhatsApp accounts within Nanonets. Once that's done, you're ready to deploy your workflow and make it live.
Let's explore a few more practical examples of how you can use Nanonets to automate your WhatsApp messaging workflow:
1. Sales Lead Notification Workflow
Keeping track of every lead and ensuring timely follow-up can be a daunting task. That's where this particular workflow comes in handy. It allows you to automate lead information capture and use that information to trigger notifications across different platforms.
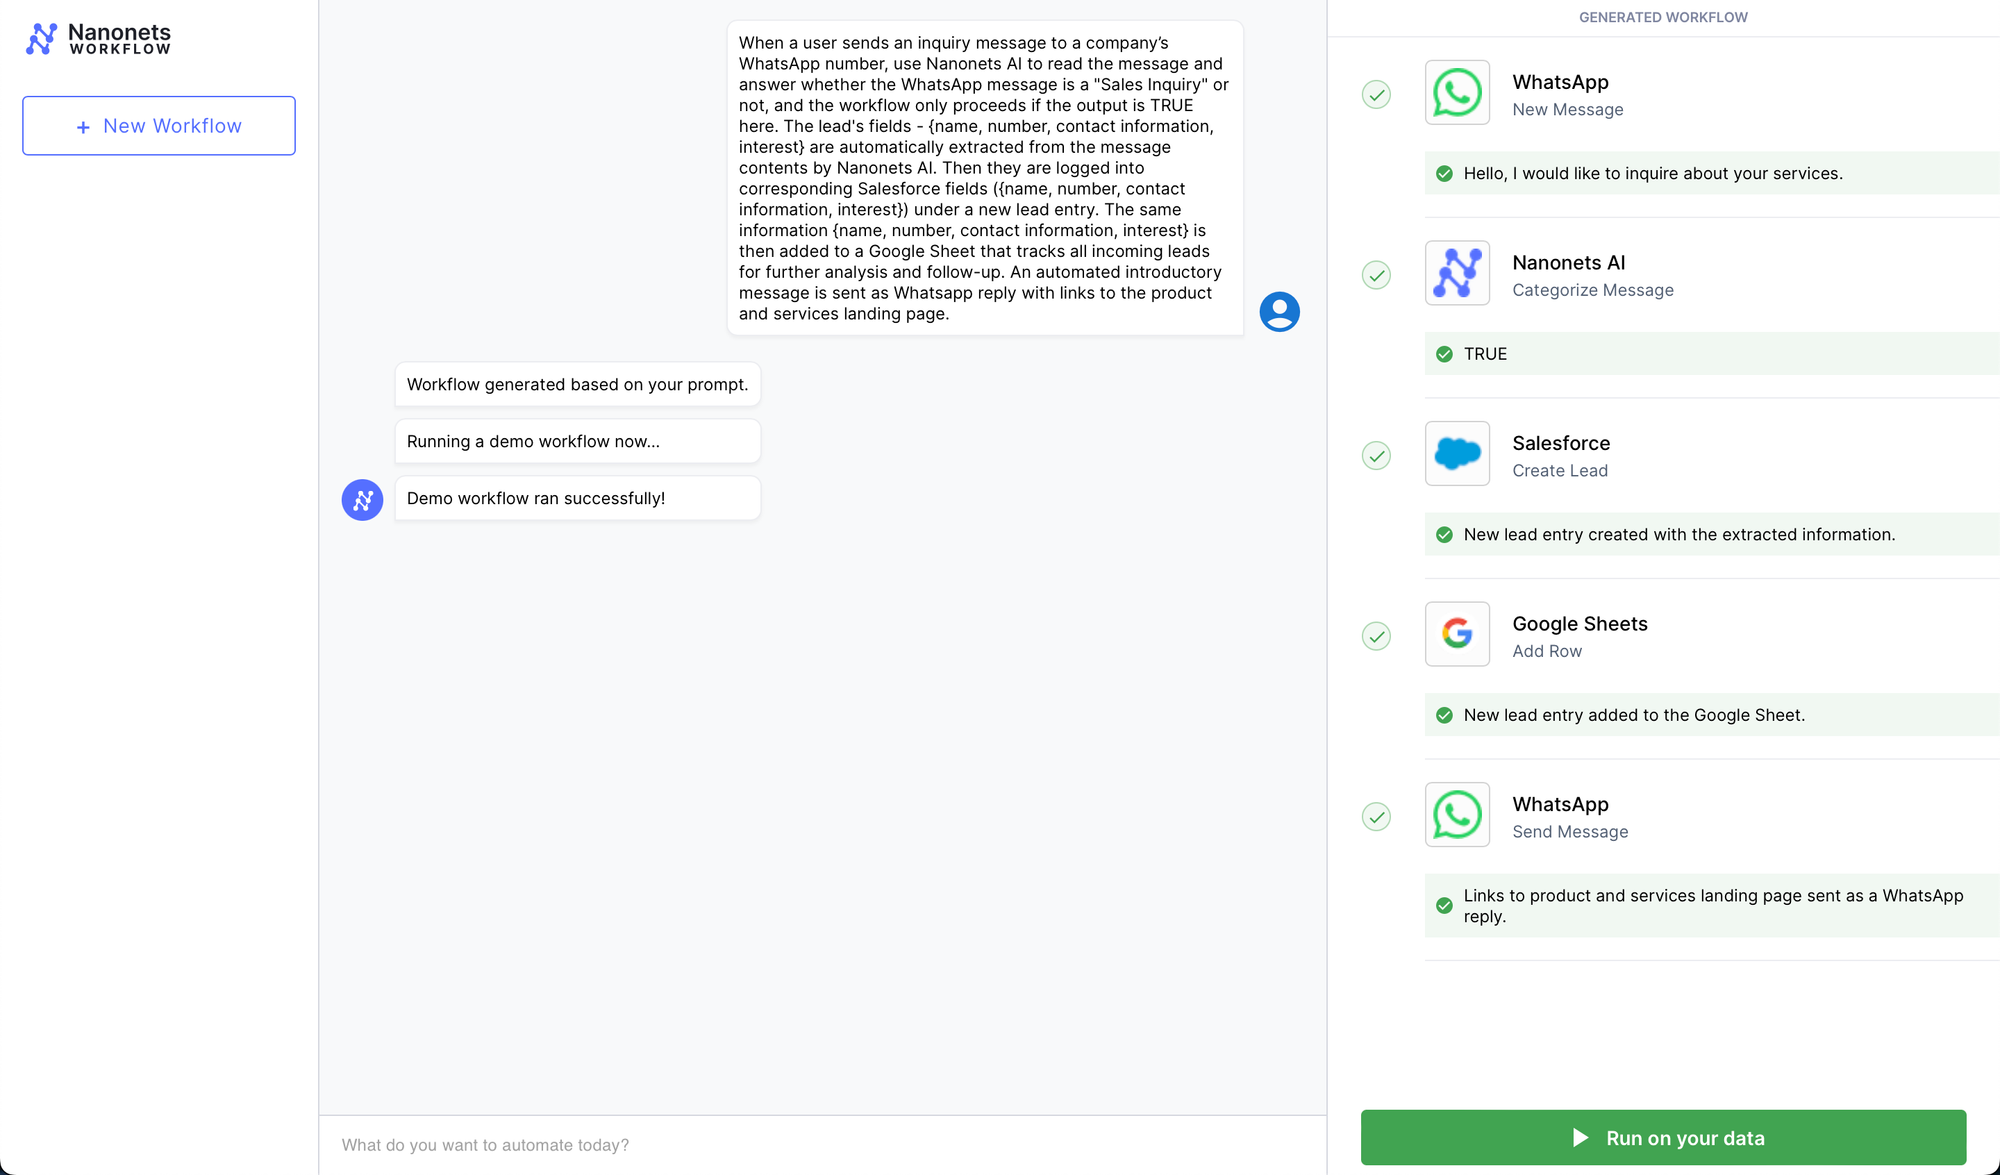
Apps Involved: WhatsApp, Salesforce, Google Sheets
Workflow:
- Trigger: A potential customer sends a message to your company's WhatsApp number expressing interest in a product or service.
- Action 1: The lead's details (name, contact information, interest) are automatically logged into Salesforce under a new lead entry.
- Action 2: The same information is also added to a Google Sheet that tracks all incoming leads for further analysis and follow-up.
- Action 3: An automated introductory message created using a WhatsApp Catalog Template is sent as a WhatsApp reply.
2. Appointment Reminder and Confirmation Workflow
When you're a service provider with a packed schedule, keeping track of each client appointment can be a real challenge. The Appointment Reminder and Confirmation Workflow takes the hassle out of this by automating reminders and confirmations.
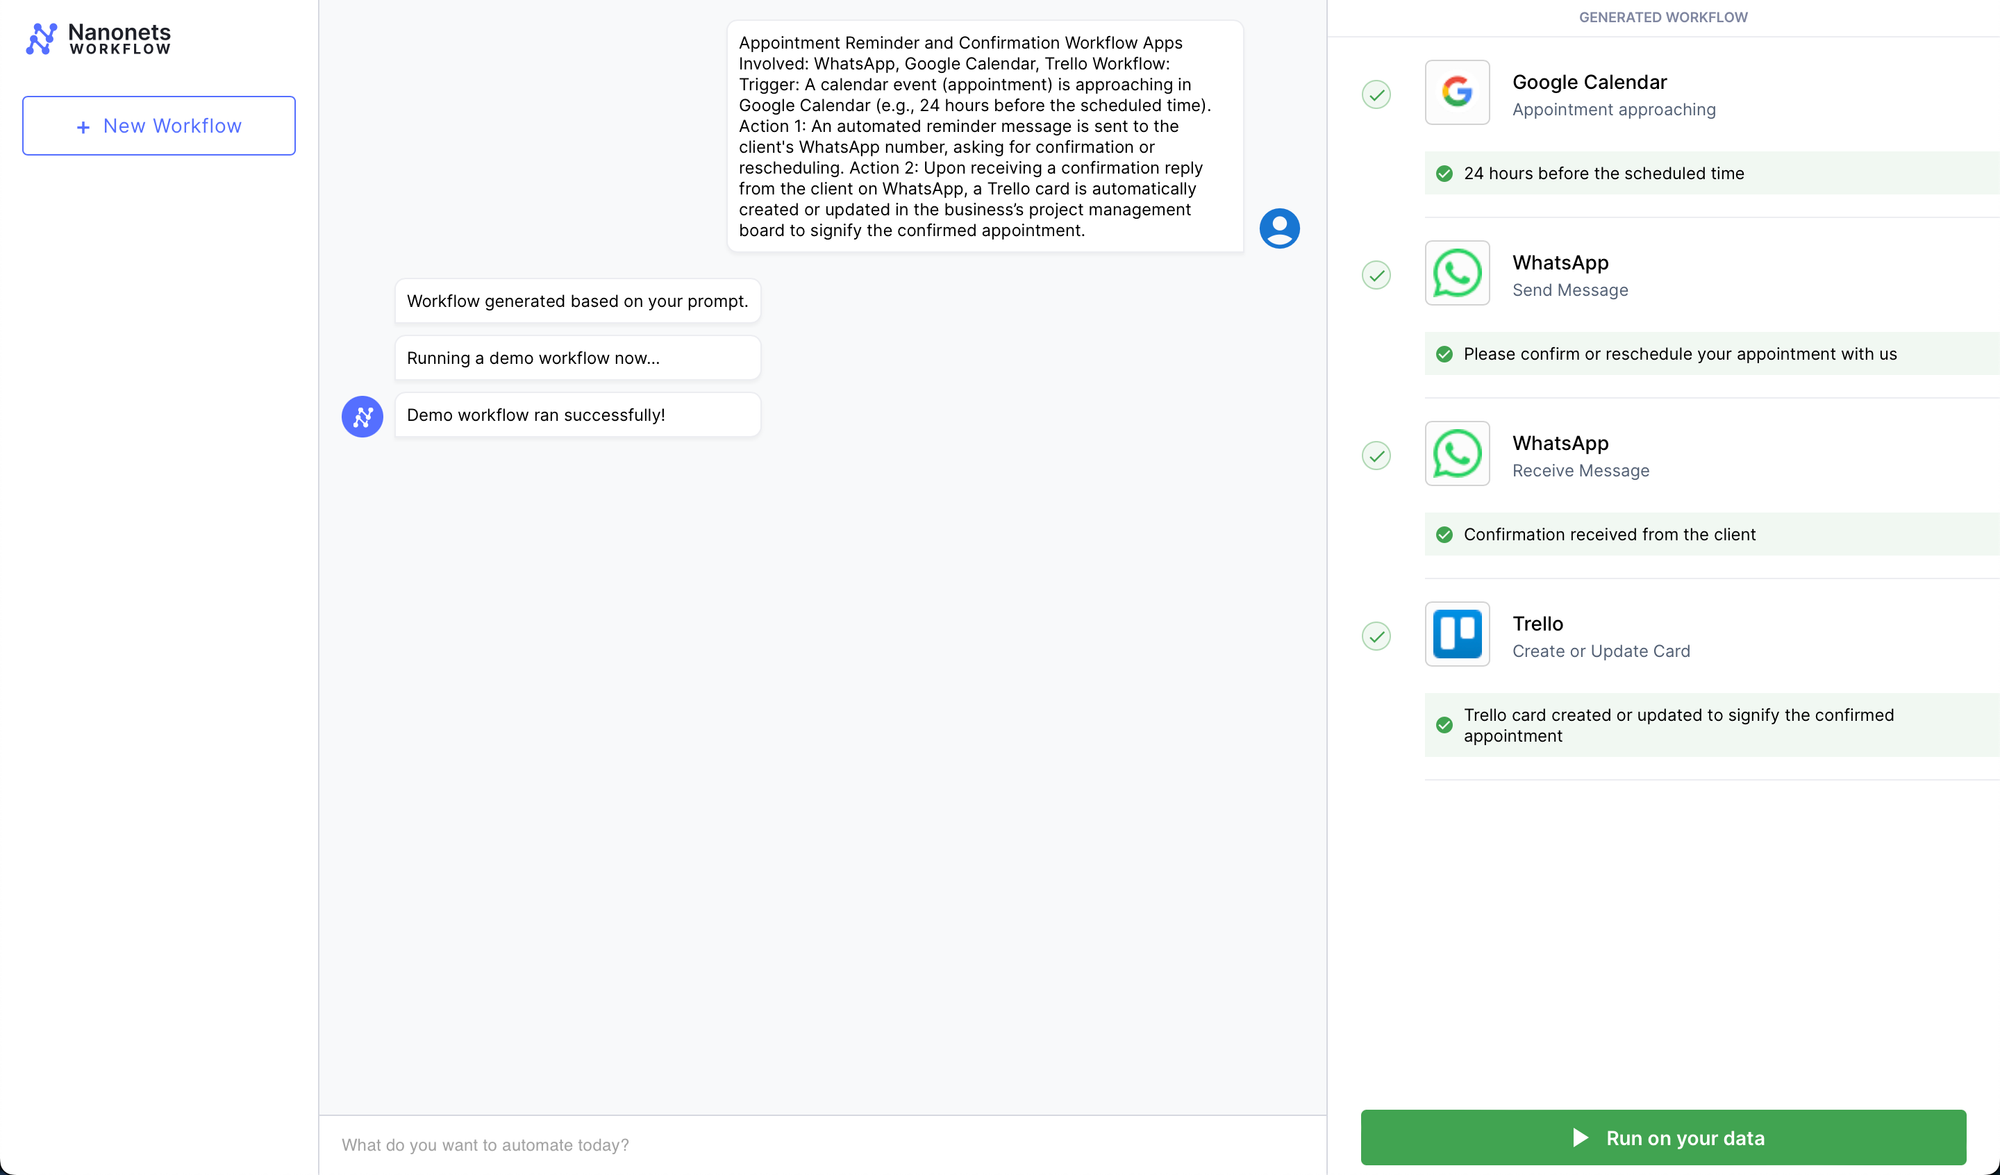
Apps Involved: WhatsApp, Google Calendar, Trello
- Trigger: A calendar event (appointment) is approaching in Google Calendar (e.g., 24 hours before the scheduled time).
- Action 1: An automated reminder message is sent to the client's WhatsApp number, asking for confirmation or rescheduling.
- Action 2: Upon receiving a confirmation reply from the client on WhatsApp, a Trello card is automatically created or updated in your business's project management board. It indicates the confirmed appointment.
3. Customer Support Ticket and Follow-Up Workflow
Managing a high volume of support requests across multiple channels can be overwhelming. The following workflow streamlines the support process by automatically creating tickets, notifying relevant teams, and ensuring prompt follow-up.
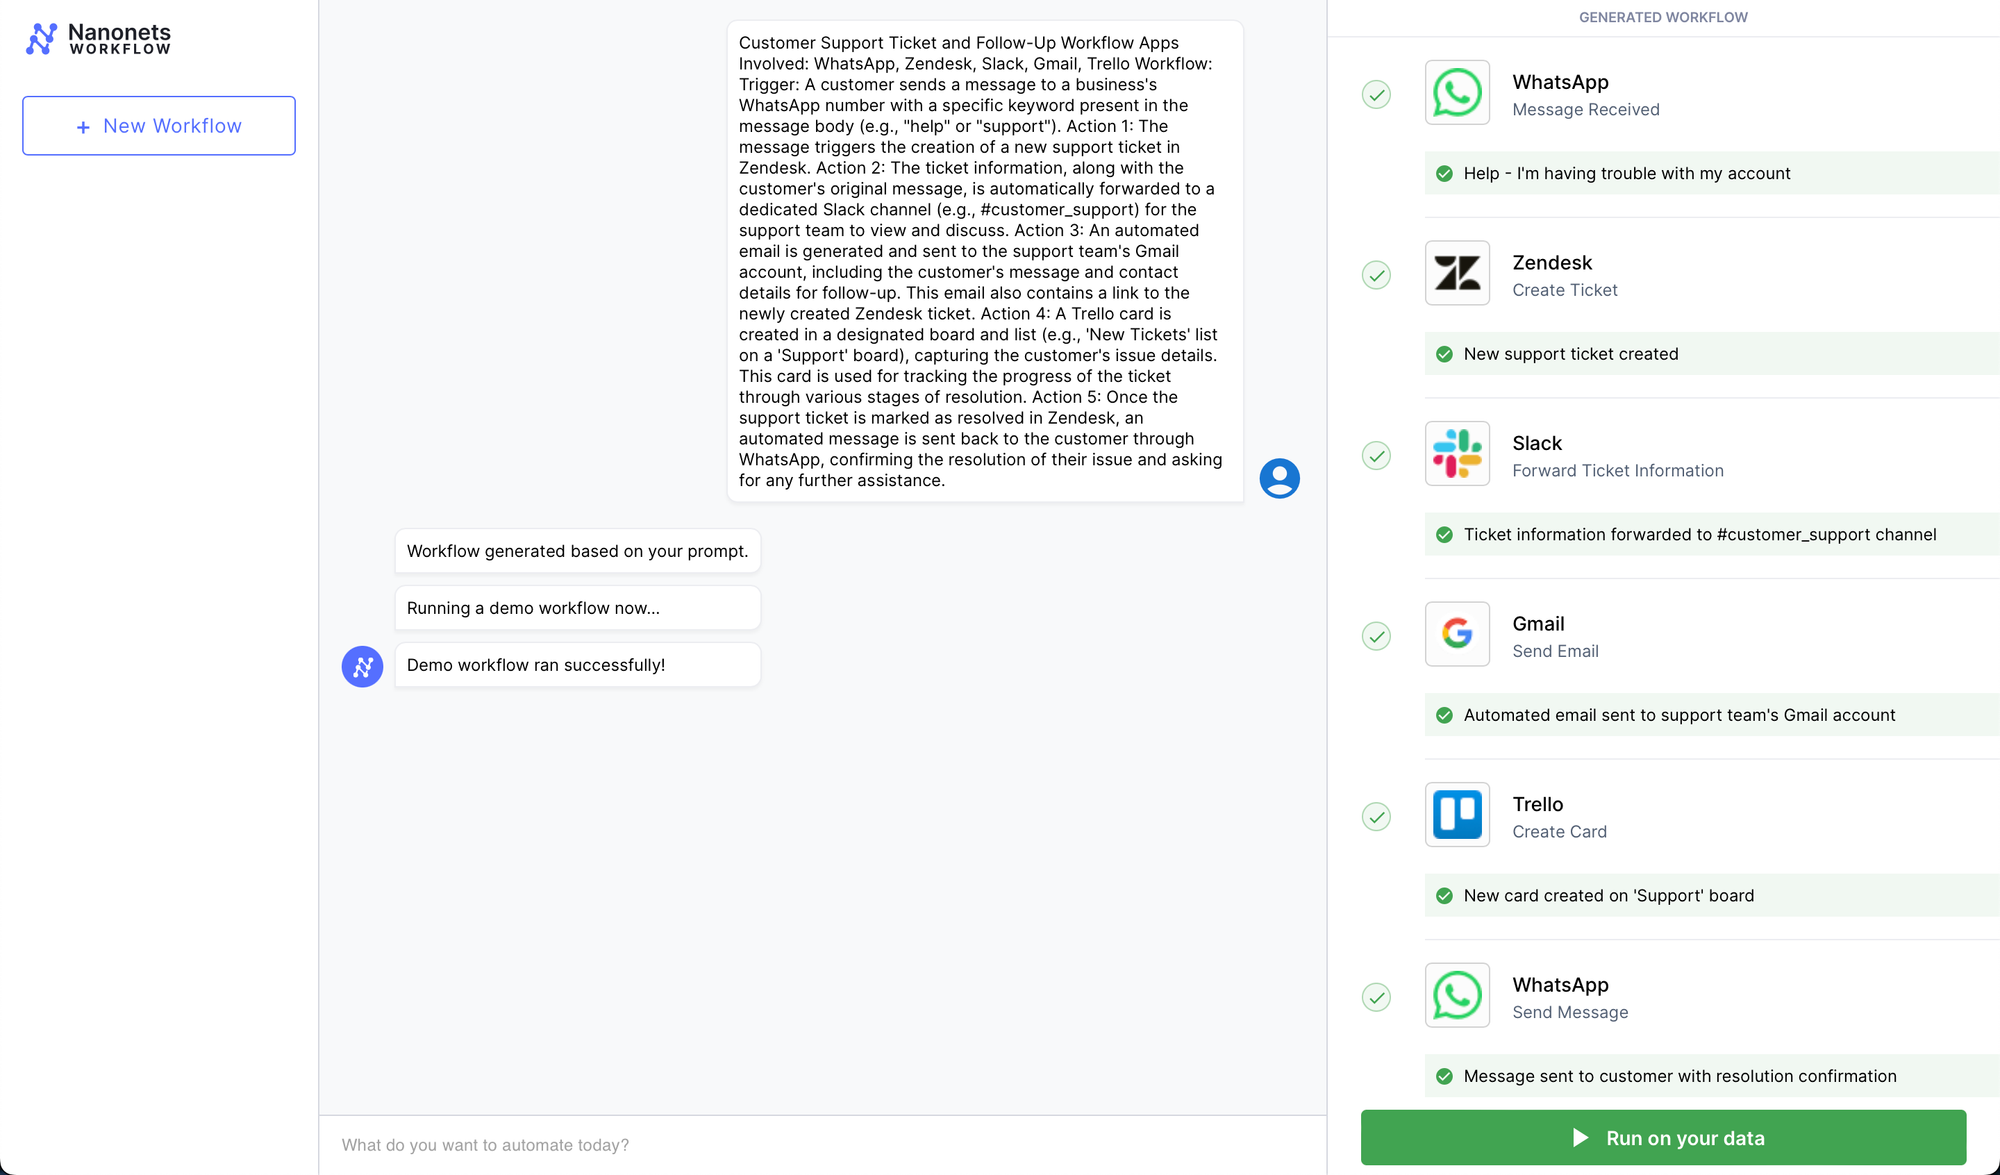
Apps Involved: WhatsApp, Zendesk, Slack, Gmail, Trello
- Trigger: A customer sends a message to your business's WhatsApp number with a specific keyword present in the message body (e.g., "help" or "support").
- Action 1: The message triggers the creation of a new support ticket in Zendesk.
- Action 2: The ticket information, along with the customer's original message, is automatically forwarded to a dedicated Slack channel (e.g., #customer_support) for your support team to view and discuss.
- Action 3: An automated email is generated and sent to your support team's Gmail account. It will include the customer's message and contact details for follow-up. This email also contains a link to the newly created Zendesk ticket.
- Action 4: A Trello card is created in a designated board and list (e.g., 'New Tickets' list on a 'Support' board), capturing the customer's issue details. This card is used for tracking the progress of the ticket through various stages of resolution.
- Action 5: Once the support ticket is marked as resolved in Zendesk, an automated message is sent to the customer through WhatsApp. It will confirm the resolution of their issue and asking for any further assistance.
These types of automated messaging workflows can make your business communication more efficient and effective. Imagine being able to respond quickly, keep track of important interactions, and easily manage tasks across different platforms. That's what you can do with Nanonets' no-code workflow automation.