

Excel is the go to tool used by professionals for data analysis. This is because excel supports a plethora of features that allow users to extract, modify, and analyze data.. Once such feature is the ability to parse data. In this blog, we are going to cover the what, why, and how of parsing data in Excel. We will go through few easy steps to help you parse data in Excel. So, let’s get started.
What is data parsing?
Data parsing is the act of making data more structured, organized and readable. Oftentimes, the raw data is unstructured, making it hard to comprehend and analyze. Data parsing makes the data easier to read. This is done via string modification. You can parse data by:
- Changing the data type of an attribute
- Combining two or more strings.
- Trimming strings or splitting them into multiple columns.
Why parse data in Excel ?
Microsoft Excel has helped business owners make data automation easy. Business plans, employee data, customer data, or accounting data can be easily organized on Excel spreadsheets.
But sometimes business workflows require Excel data to be transformed or modified and sent to ERPs, CRMs, or even Google Sheets.
Cleaning up or parsing such data manually from Excel is often time-consuming and error-prone. And unfortunately, Excel doesn’t integrate with ERPs or CRMs out of the box.
That's where an Excel parser or Excel data parsing can help.
How to parse data in Excel
Ever cleaned up data on Excel? Data imported into Excel or maintained on spreadsheets can often get cluttered and messy. Not all data is required for every business process.
Hence, we need to parse data in Excel. Below are the outlined steps to help you parse data in Excel.
TL;DR,
- Open the excel spreadsheet with the data
- Select the column containing the data that you need to parse.
- Click on Data -> Text to Columns. Convert Text to Columns wizard window opens.
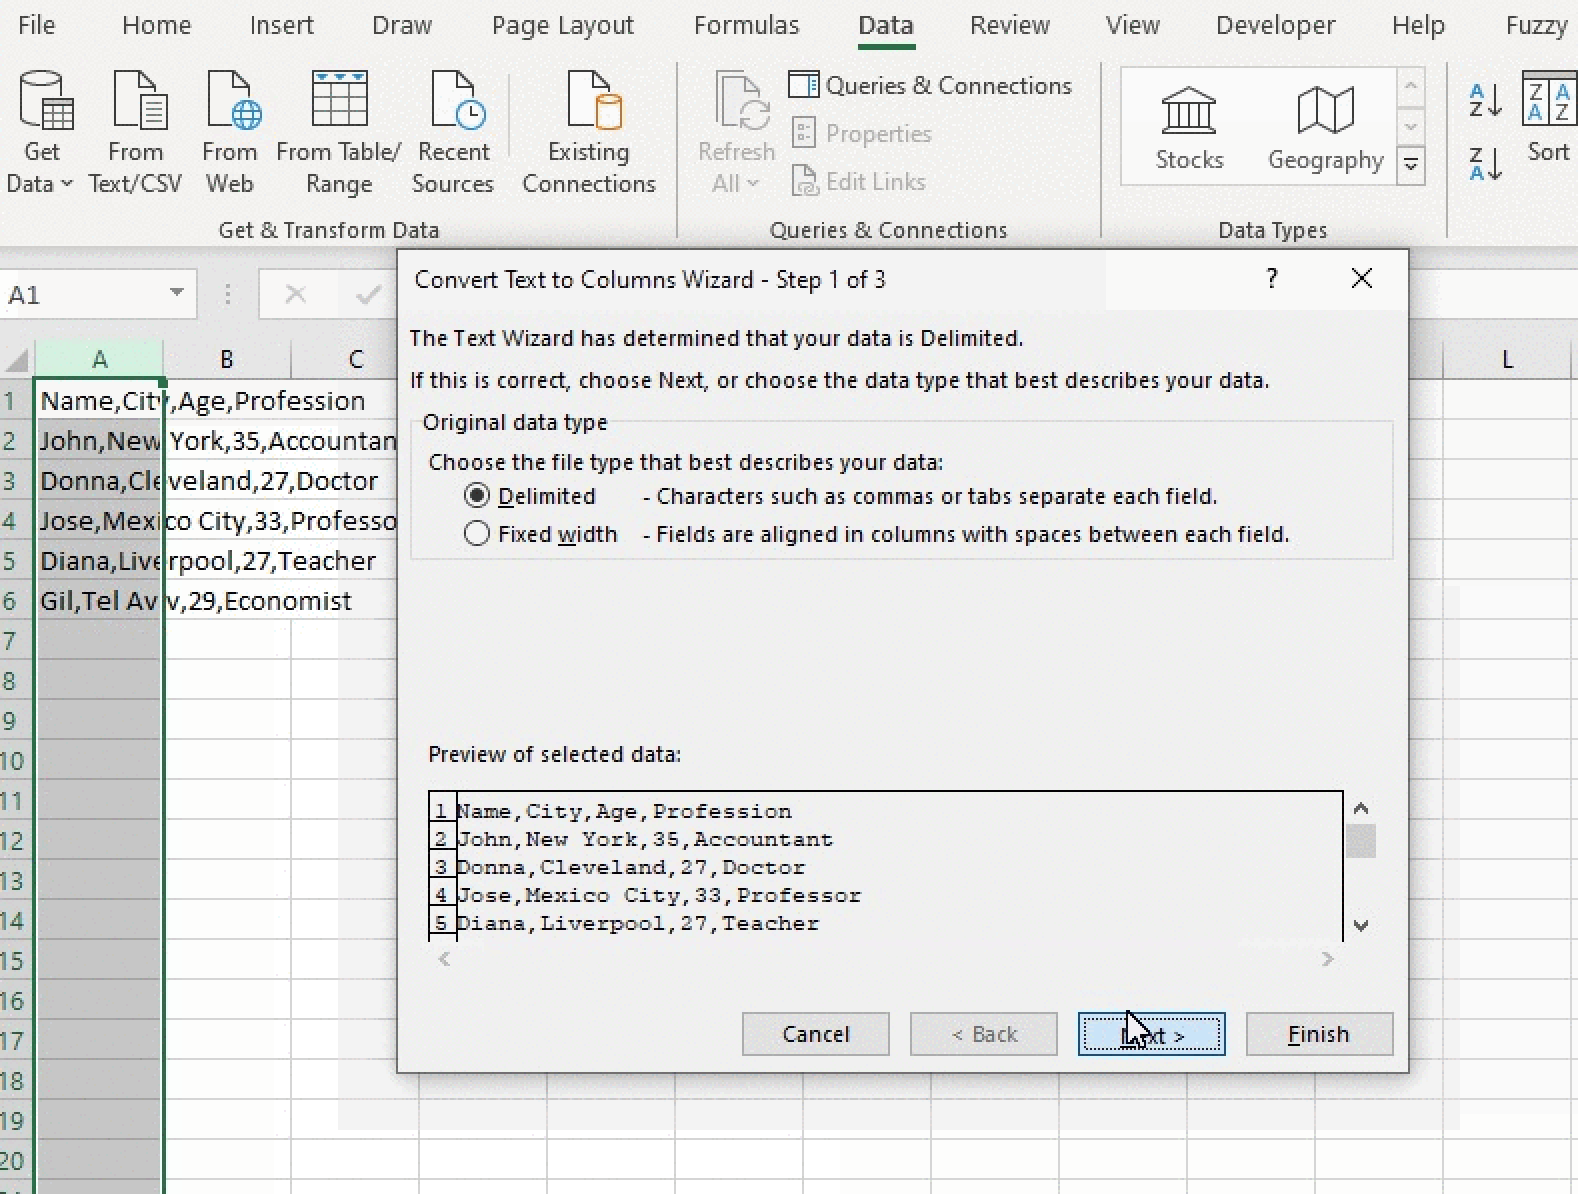
- In step 1, Select Delimited and Click on Next.
- In Step 2, Select the appropriate delimiter and click on Next.
- In Step 3, Select General. You can preview how the data will appear with the Data Preview window. Once satisfied, click Finish.
- The data is successfully parsed.
Deep dive into parsing data in excel
-
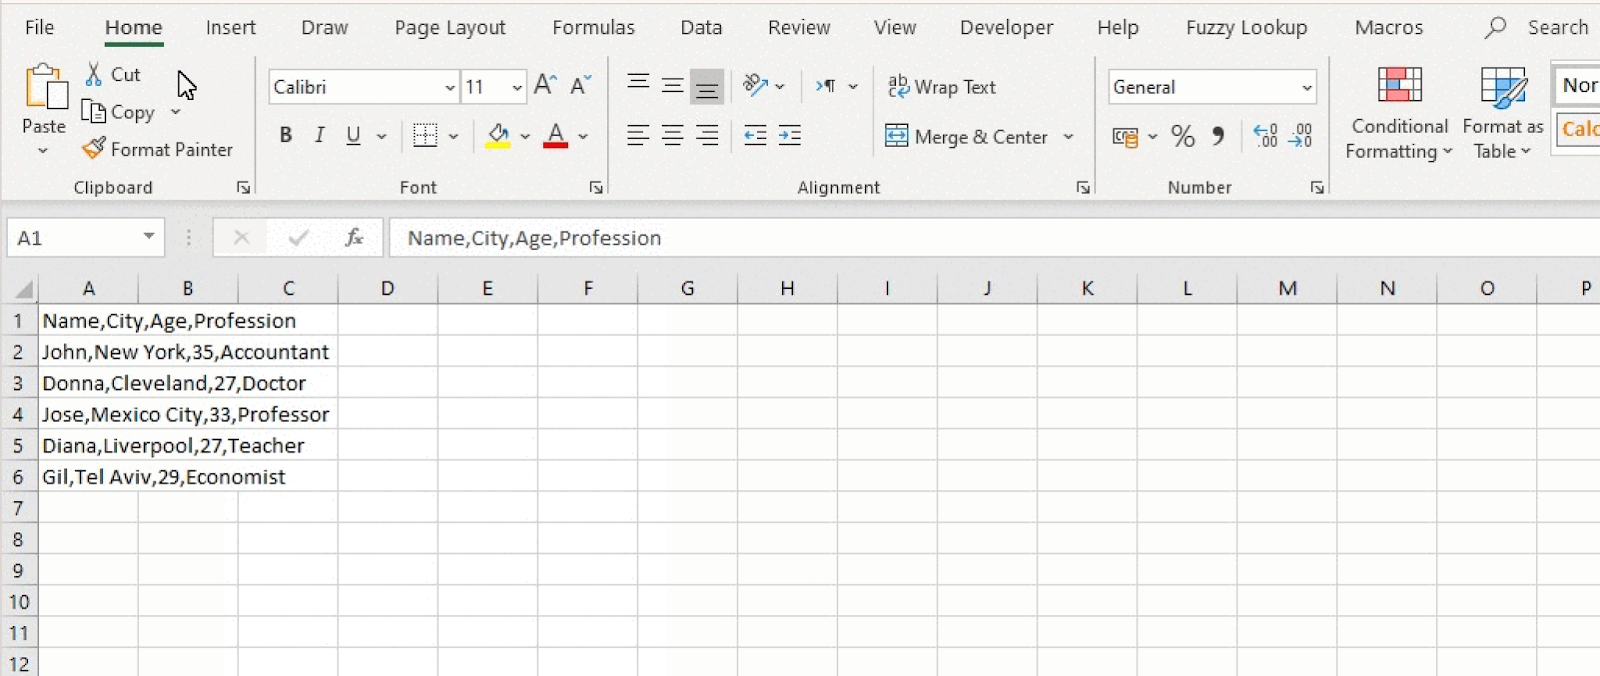
Open the blank excel spreadsheet. Oftentimes, raw tabular data that needs to be parsed is present in text files. To insert data into excel, copy the content of the text file. Click on Column A1 and paste the copied data.
-
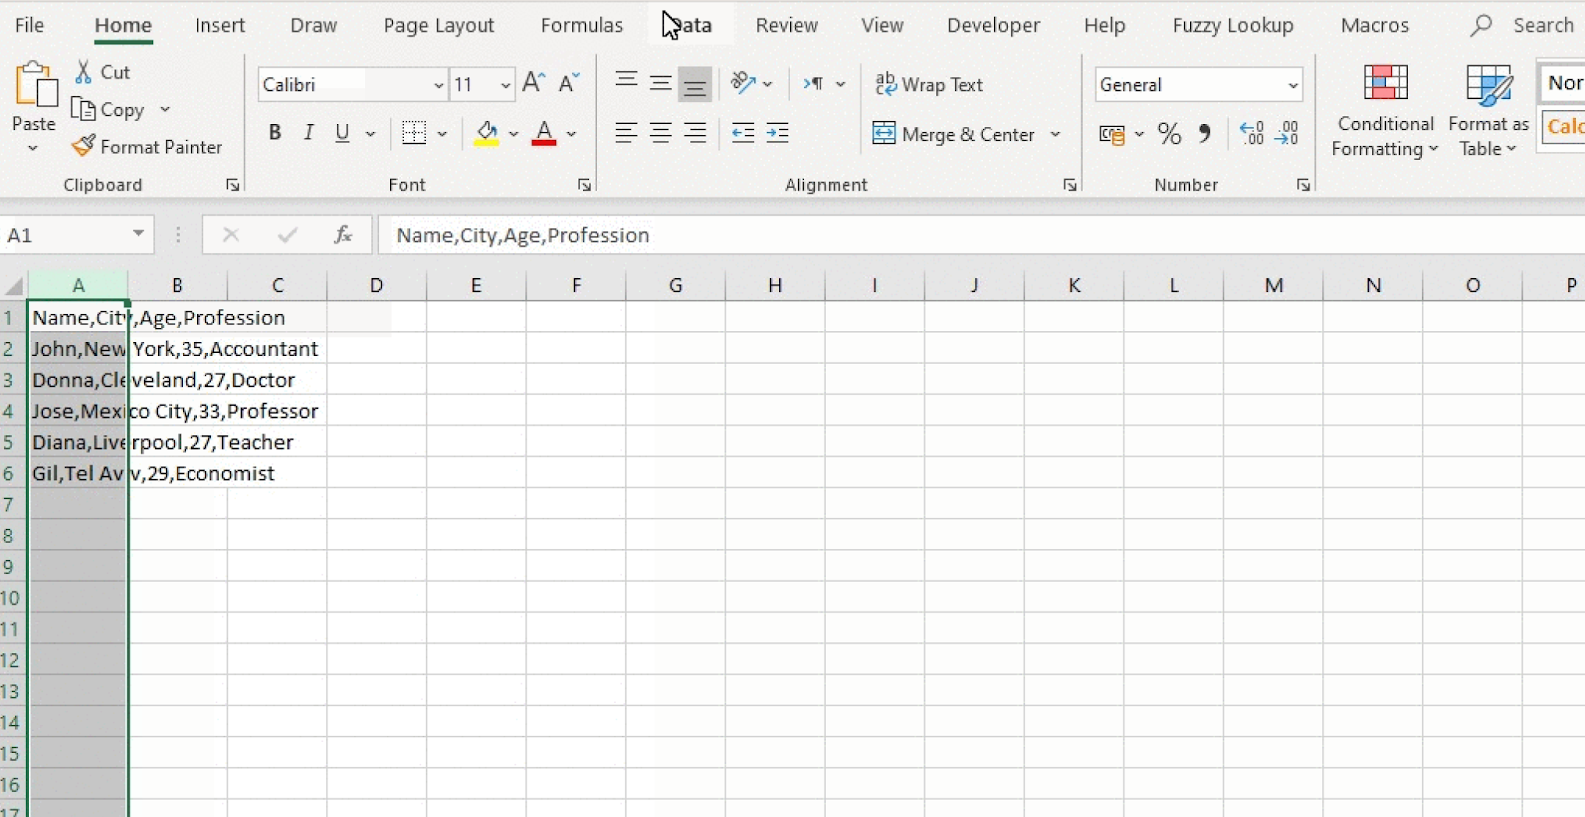
Select the column containing the data that you need to parse. This can be done in two ways.
- The first method is to hover over the top cell of the data you want to select until it changes to a "+" symbol, then click and drag the mouse down until you select every cell.
- The second method is to click on the letter at the top of the column. This will select all the cells in that column.
-
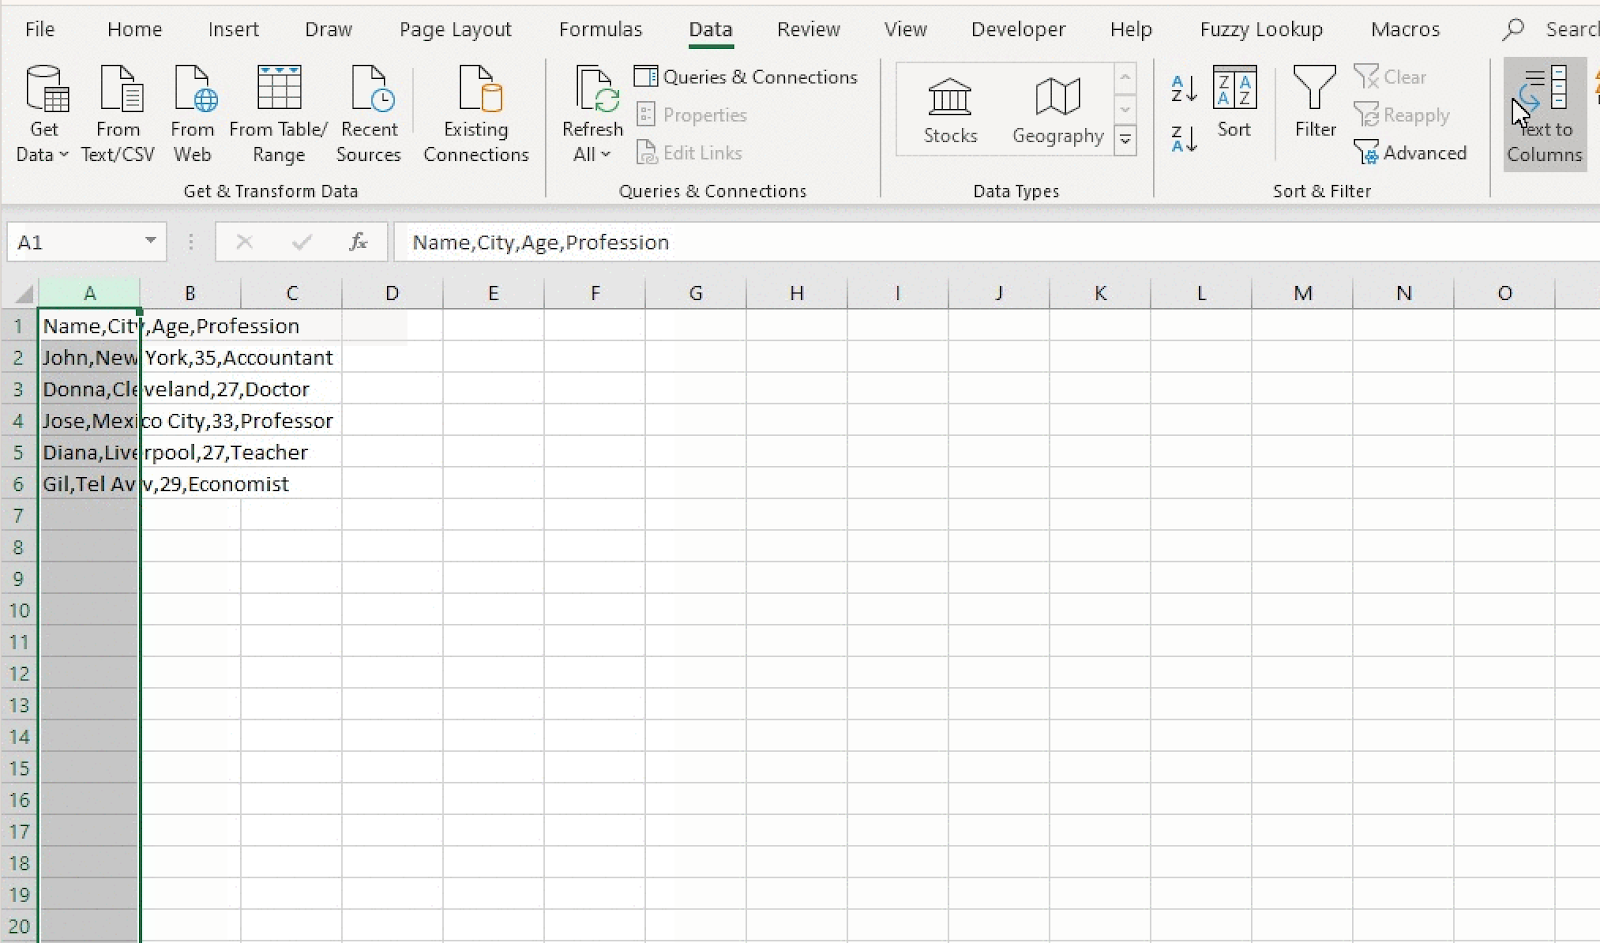
Click on Data from the Top Ribbon to open the data function present in Excel. The default selection is the Home option
-
Click to select the Text to Columns option. This will open up the Convert Text to Columns wizard window. This is the most effective way to parse data in excel.
-
Step 1 of 3: The text wizard has accurately determined the delimited data. Select Delimited and click on Next. Data with a delimited data type has columns separated via a character such as space, comma, or semicolon.
-
Step 2 of 3: Select the delimiter that exists within your data and click Next. Most common delimiters are comma and space. The data gets split into multiple columns in the data preview window upon selecting the correct delimiter.
Choose an appropriate delimiter if the data is not split into multiple columns in the data preview window. You can even provide a custom delimiter by selecting Other and typing the delimiter.

-
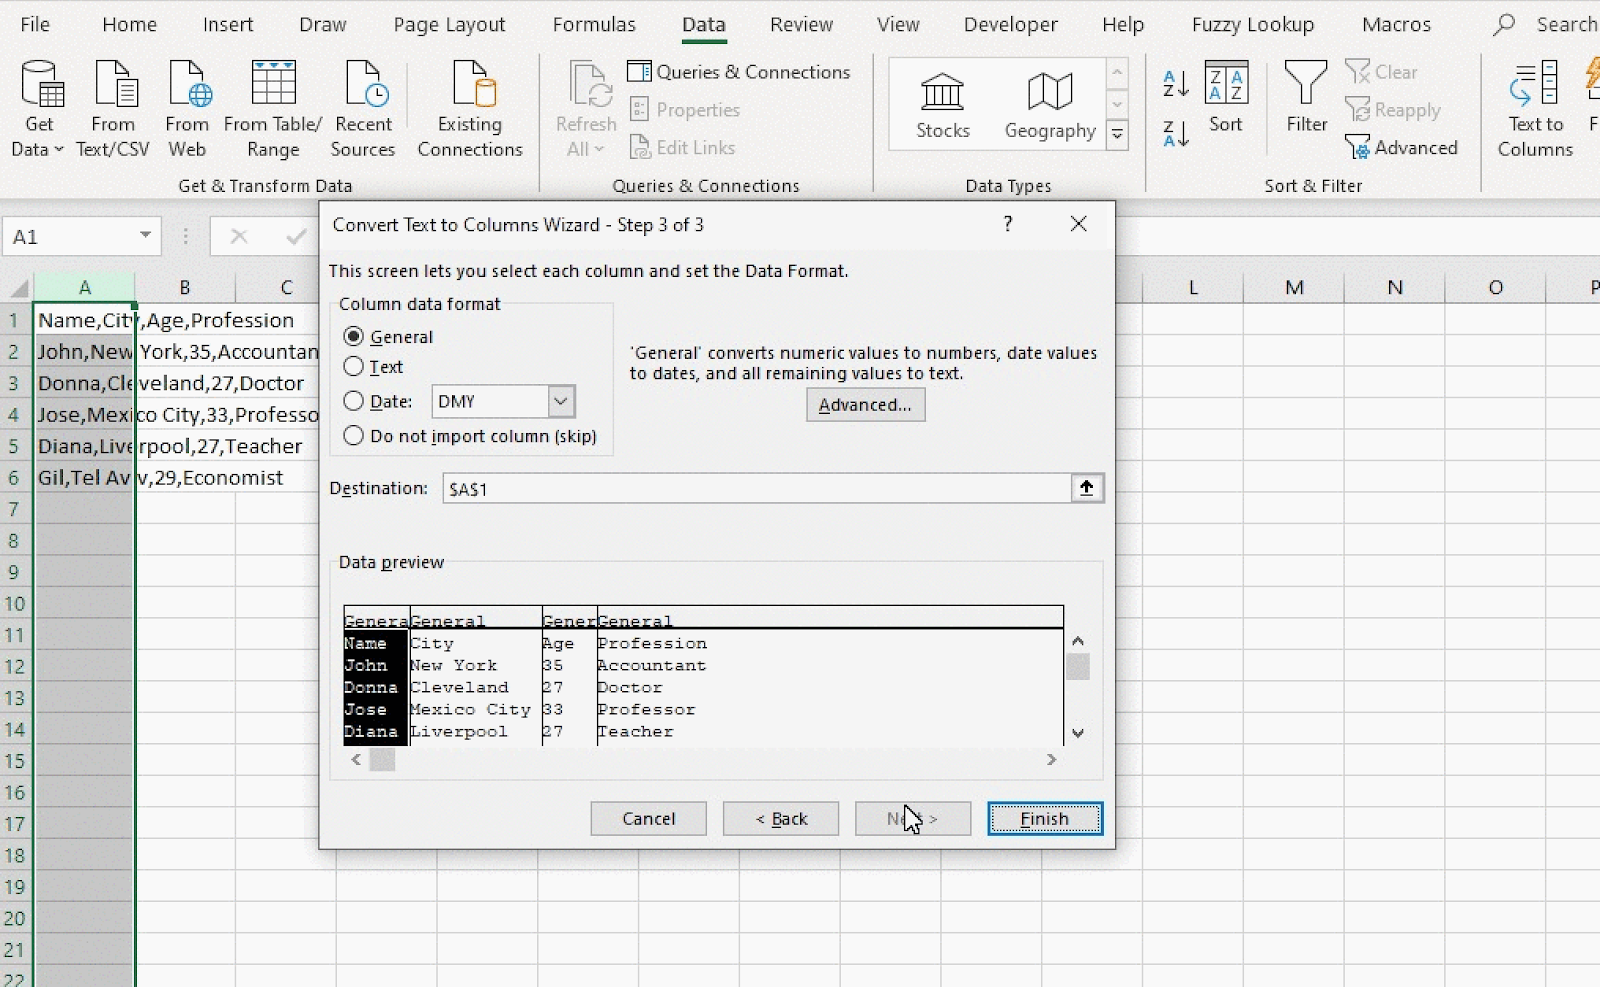
Step 3 of 3: In most cases, selecting column data format as General will suffice. General format converts numeric values to numbers, date values to dates, and all others as text.
However, if you need the columns to be in a specific format, select the column by clicking on it in the Data preview window and then selecting the appropriate format.
For example, if you want age as text instead of number, select Age column by clicking on it in the data preview and selecting the column data format as Text. In general format, Age column would have been formatted as a Number.
-
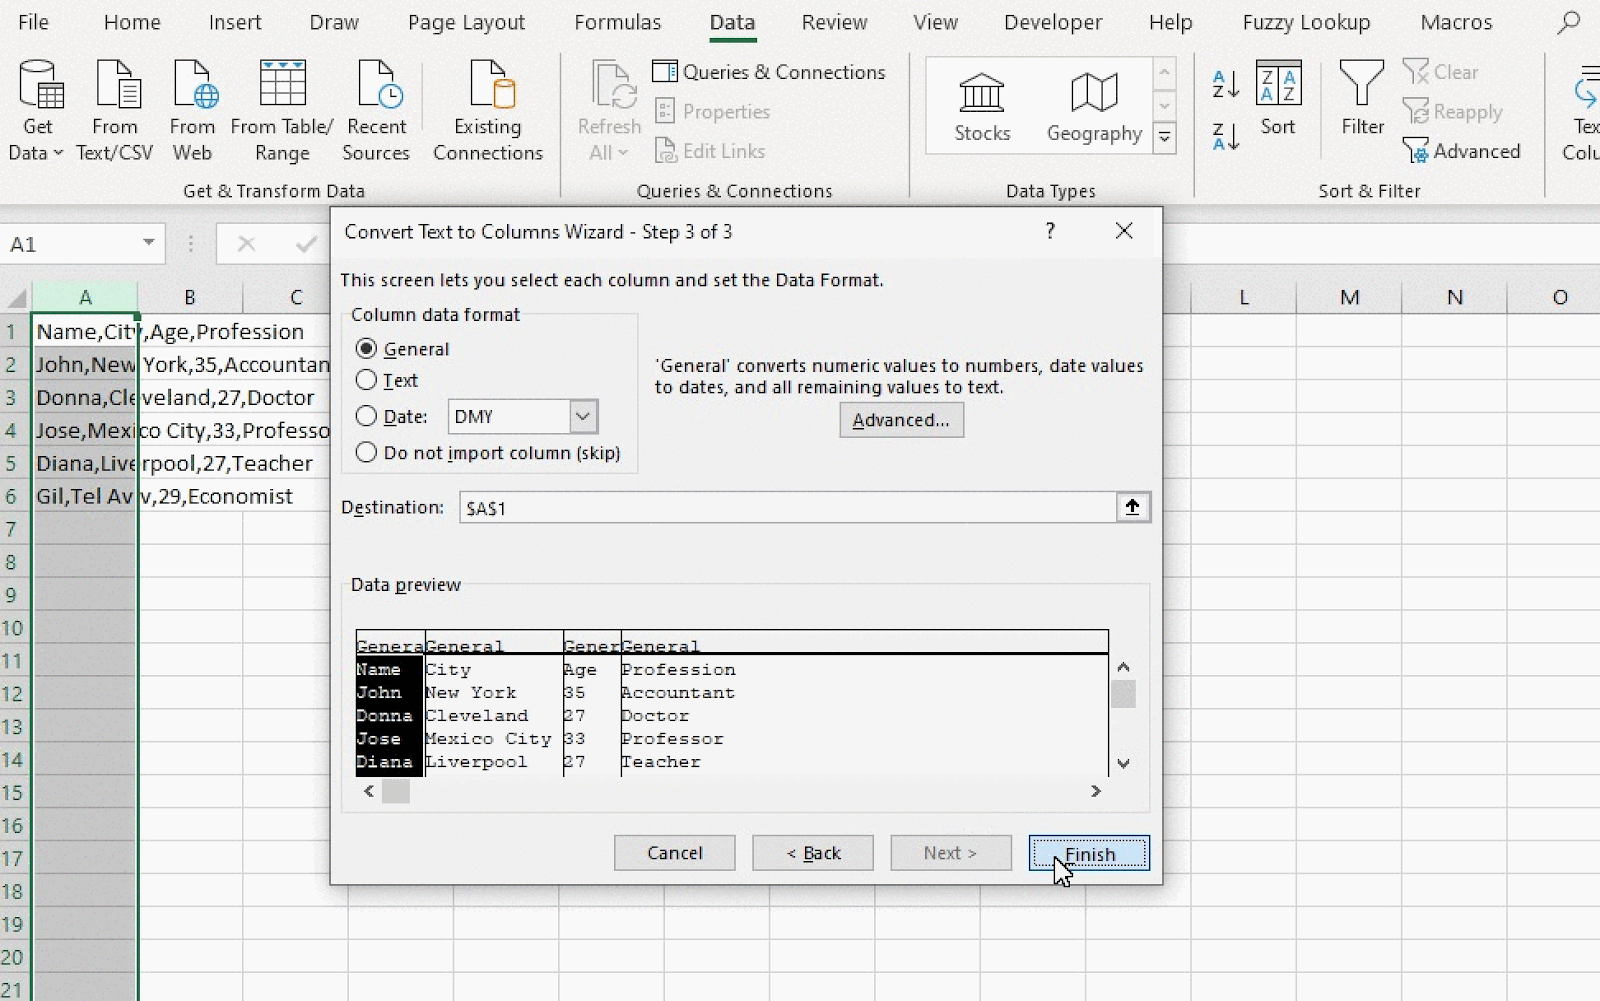
The default destination is usually the top and left-most column of the selected data (in this case it is $A$1). You can change it by clicking on the Up arrow button to choose the destination for the parsed data.
-
Once you are satisfied with everything, click on Finish. This will finish the parsing process.
-
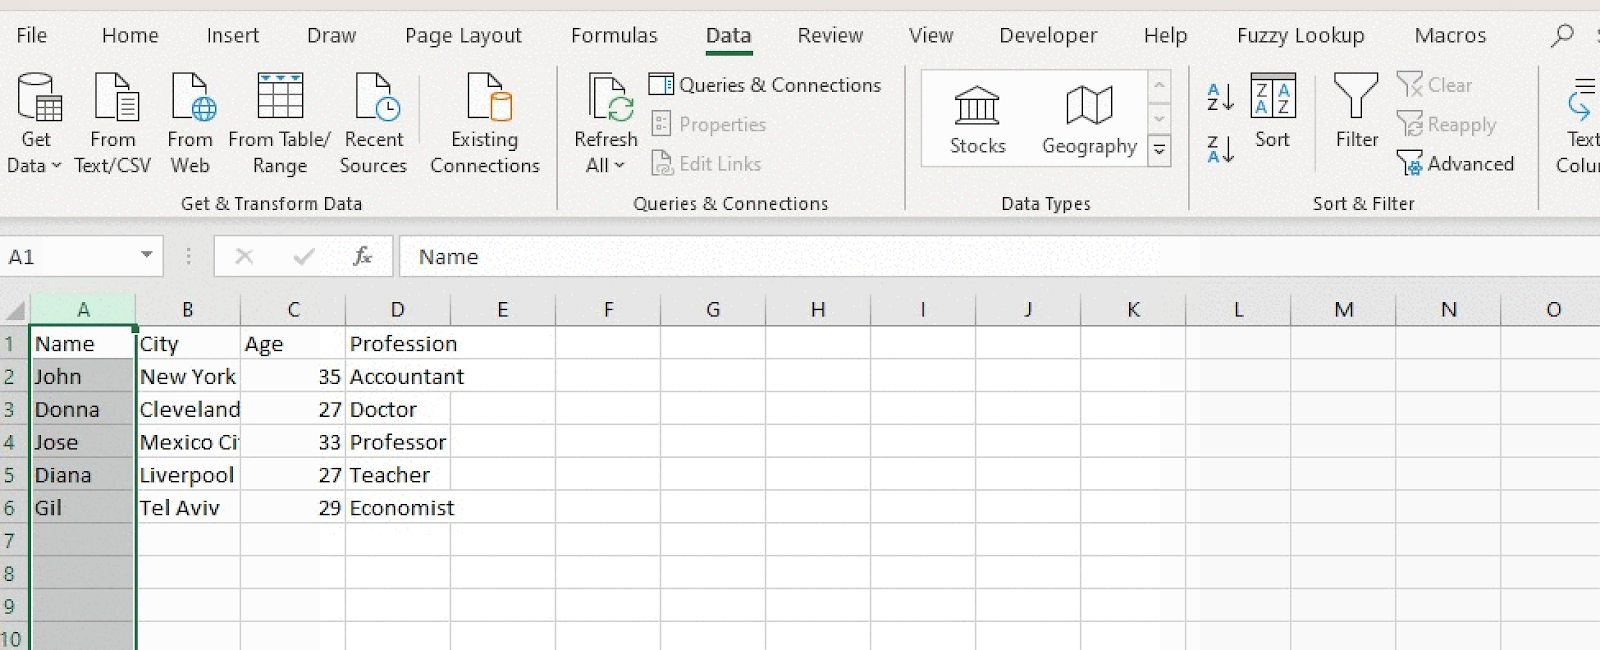
You have successfully parsed the data by transforming it and splitting it into multiple columns. You can now use the data into further analysis.
Supercharge your Excel data parsing workflows with Nanonets. Automatically modify your Excel data in any way you prefer.